
Before the HSTA-209 WiFi inventory data collector can be utilized, two steps will need to be taken:
-
The device must be charged and powered on
-
The device will need to be connected to an internal internet network.
Charging HSTA-209
The HSTA-209 device can be charged in one of two ways:
-
Charging Cradle (Available with separate purchase)
USB Type-C Charging
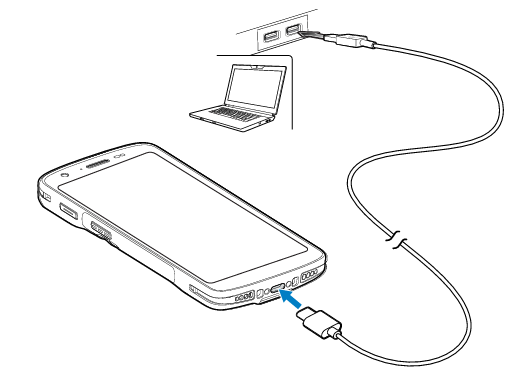
To charge the HSTA-209 inventory collector device:
-
Plug the included USB-C cable into the bottom of the HSTA-209 where the USB-C charging port is present
-
Plug the USB Type A connector into a PC's charging port, or up to a 12v 2.5A charging brick (12W)
-
Once the device is fully charged, the battery indicator in the top right corner will display
Note: USB-C is a charging standard, meaning that any USB-C cable can charge the HSTA-209 device if a replacement is needed on short notice
Charging Cradle
The charging cradle accessory (sold separately) supports increased charging speed, charging your device from 0 - 80% in 1 hour and 20 minutes.

To set up the charging cradle:
-
Plug the USB-C cable into both the USB-C port on the cradle and the USB-A port of the power supply
-
Plug the AC/DC power supply into a wall outlet
-
Place the HSTA-209 device into the cradle
Note: The HSTA-209 can only be inserted in one direction. If the device does not appear to seat correctly, confirm that the screen of the device is facing forward
Note: If the HSTA-209 does not charge when inserted, confirm the USB-C cable is in functioning condition, and that the gold contacts on both the cradle and the bottom of the HSTA-209 are clean
Connecting to WiFi
Guest networks may impose issues with communicating with the Vego Inventory servers, preventing you from using the app and receiving app updates due to firewall and security limitations.
If your location has a guest network and you experience any issues, the device must be connected to an internal network
To connect your HSTA-209 to your internal internet network:
-
Unlock the device by swiping up to access the home screen
-
From the top edge of the scanner, swipe down to access the Notification panel

-
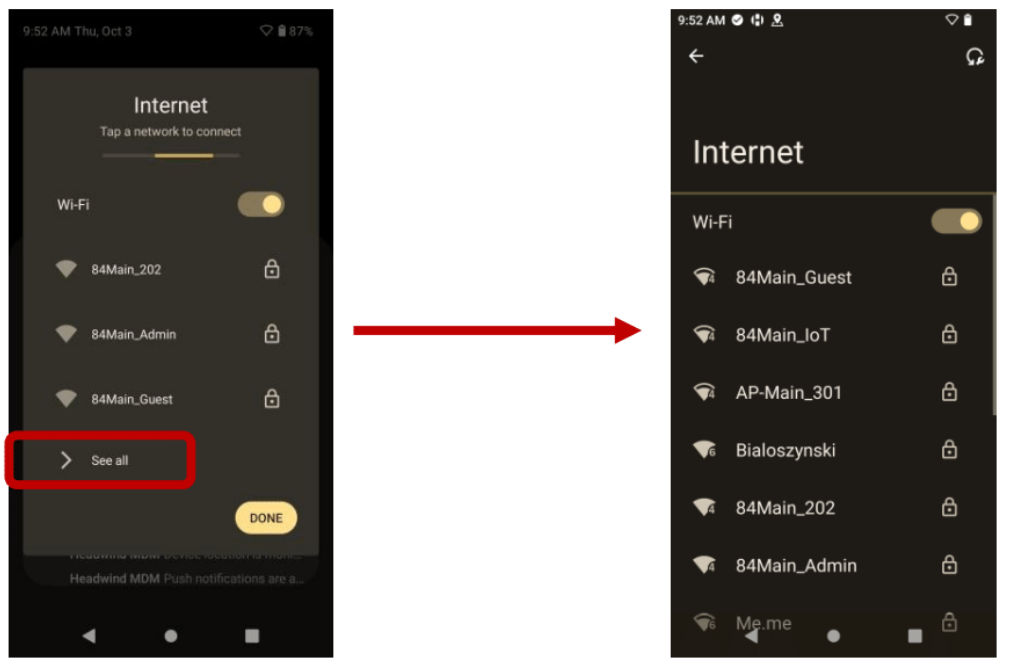
On the top left corner, tap the button that says Internet
-
Select See All
-
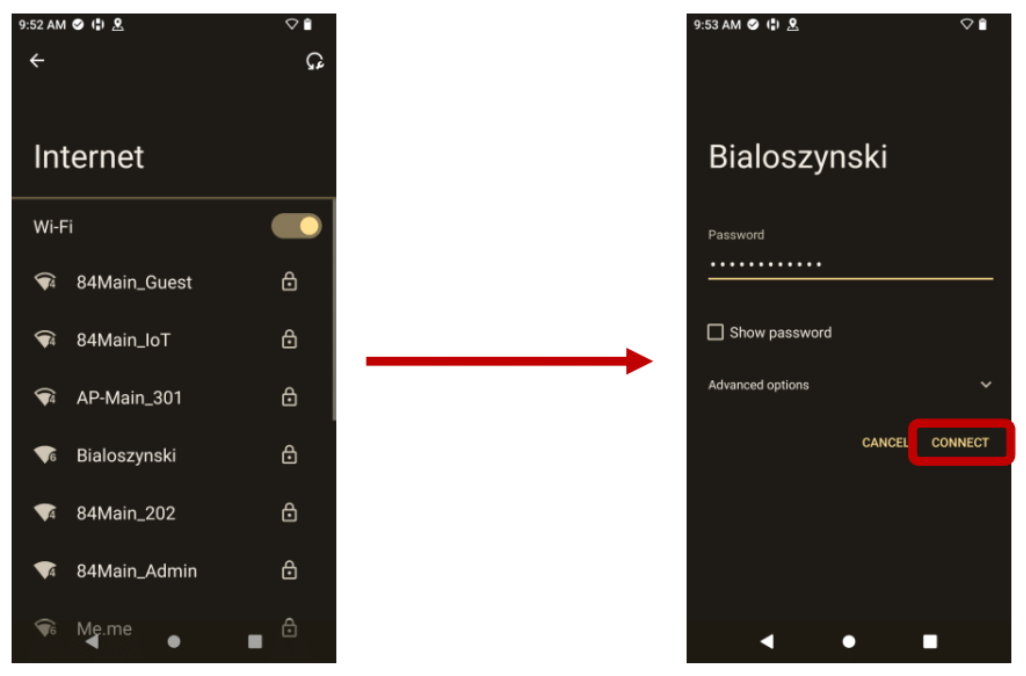
Select the intended WiFi network from the list, enter the network's password, and select Connect
Ensure that the network you are connecting to is not a guest network. If you are unsure if the network you are connecting to is a guest network or not, contact your IT department for clarification.
-
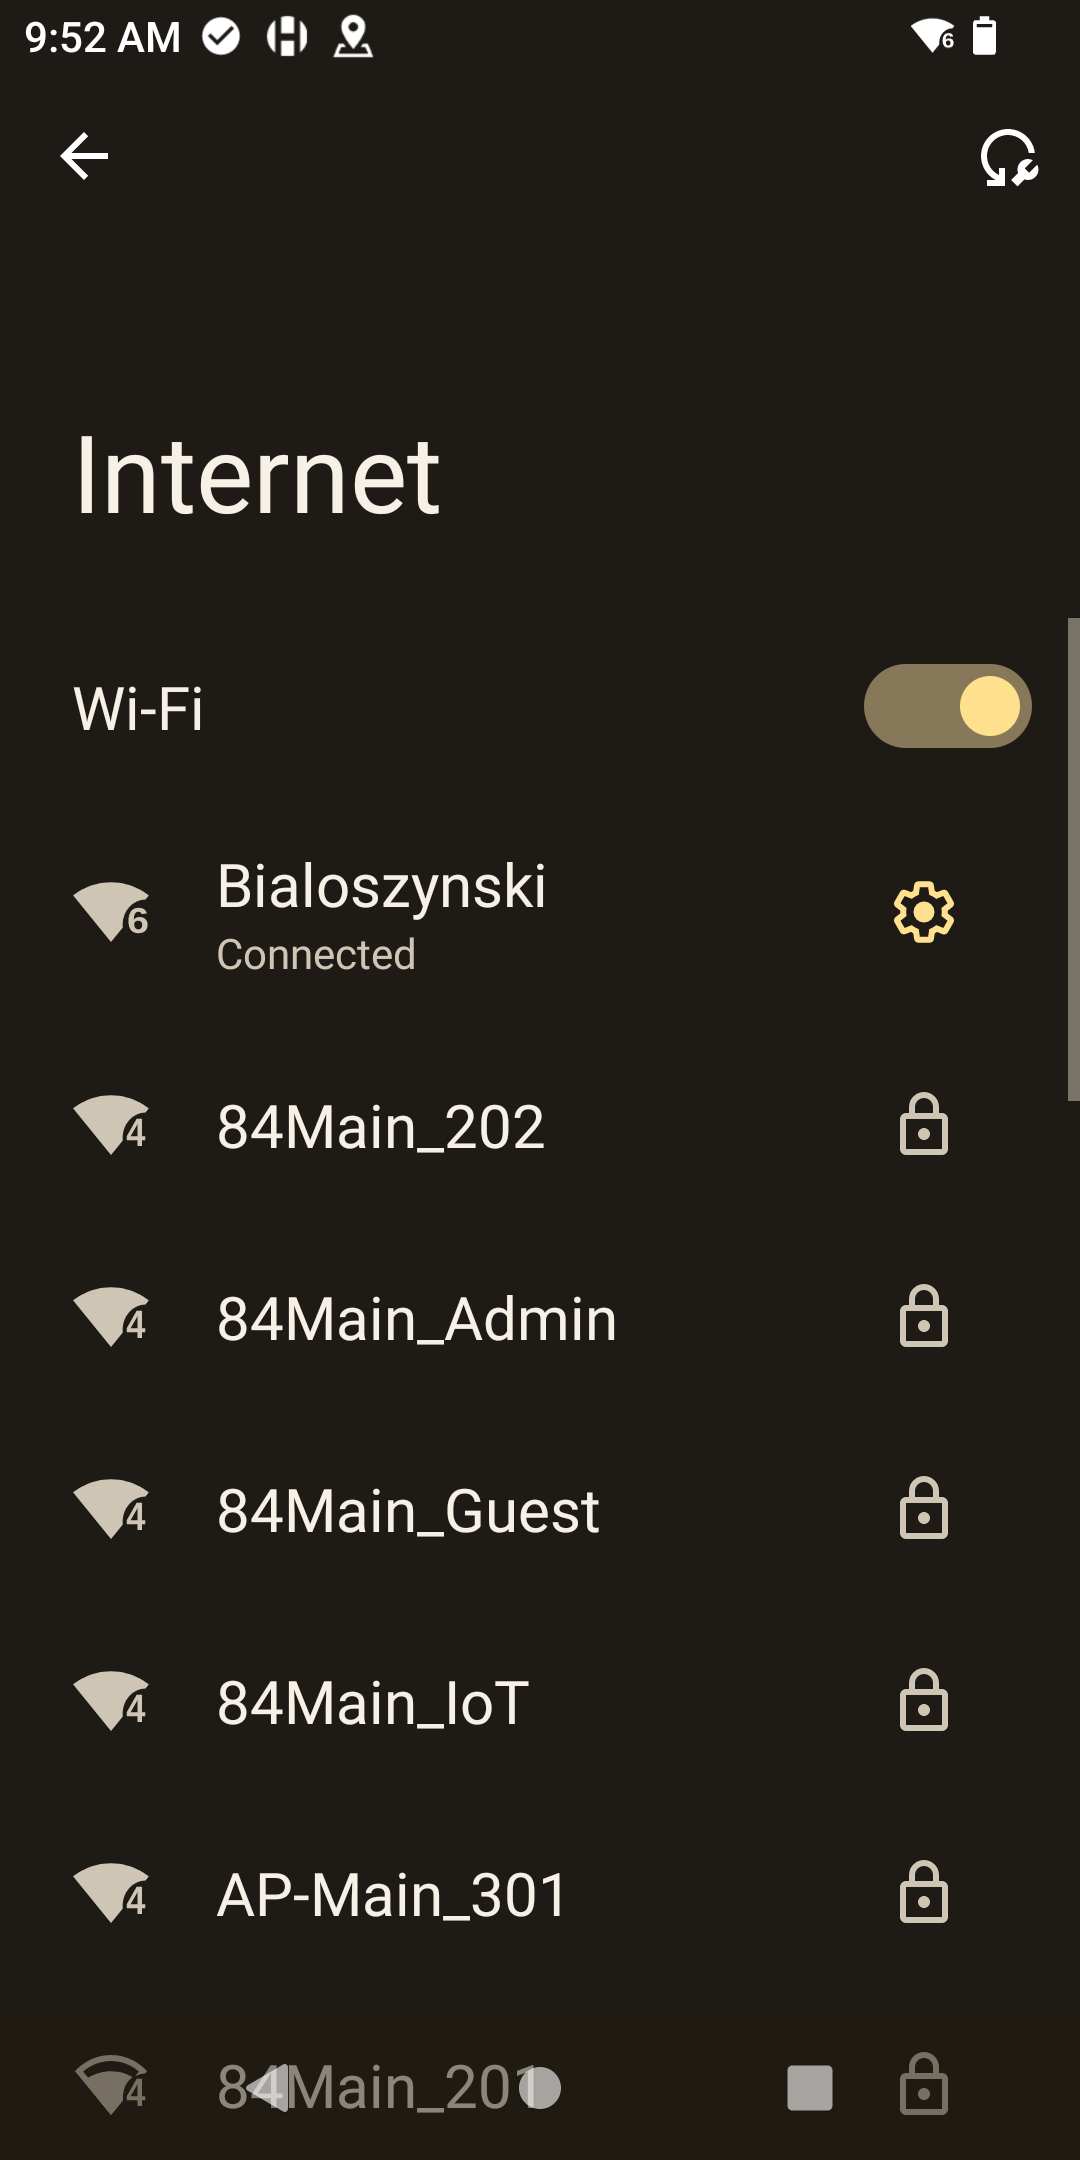
If the entered password was correct, you will see the text Connected under the network name you signed into
-
Now that you have successfully connected to your wifi network, your device is now ready to receive any future application updates automatically.