
Receiving Shipments
To receive a shipment, you will first need to sign into Vego Inventory on your PC and then log in with your HSTA-209
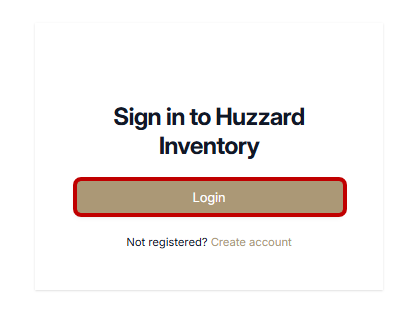
Login to Vego Inventory
-
Access inventory.huzzard.com
-
Once the sign-in screen displays, click the Login button that displays
-
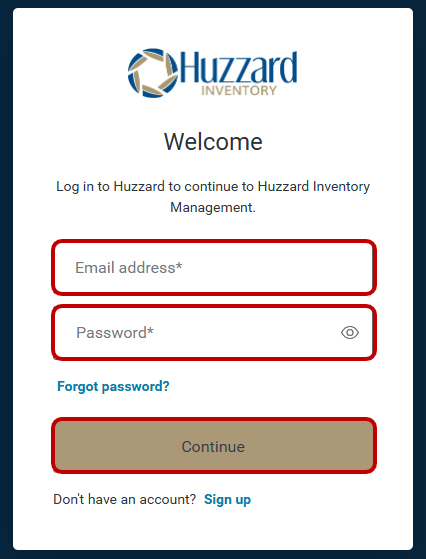
If you have a Vego Inventory account, enter your account credentials and click “Continue”. If you do not have credentials, follow instructions to create a Vego Inventory account
Logging HSTA-209 In
-
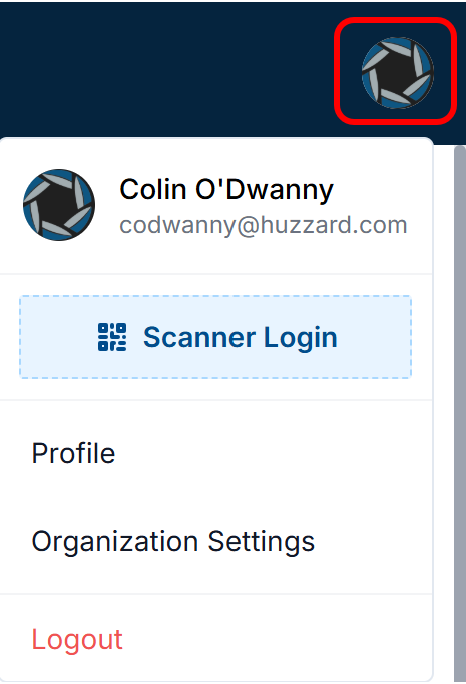
Sign In to Vego Inventory on your PC
-
Click your profile in the upper right-hand corner
-
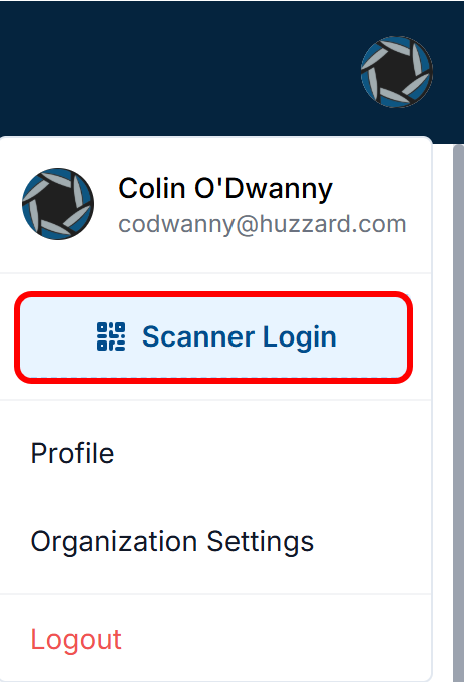
Click “Scanner Login”
-
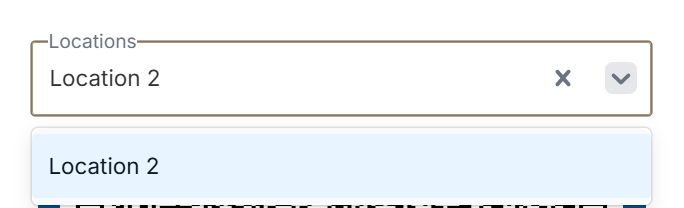
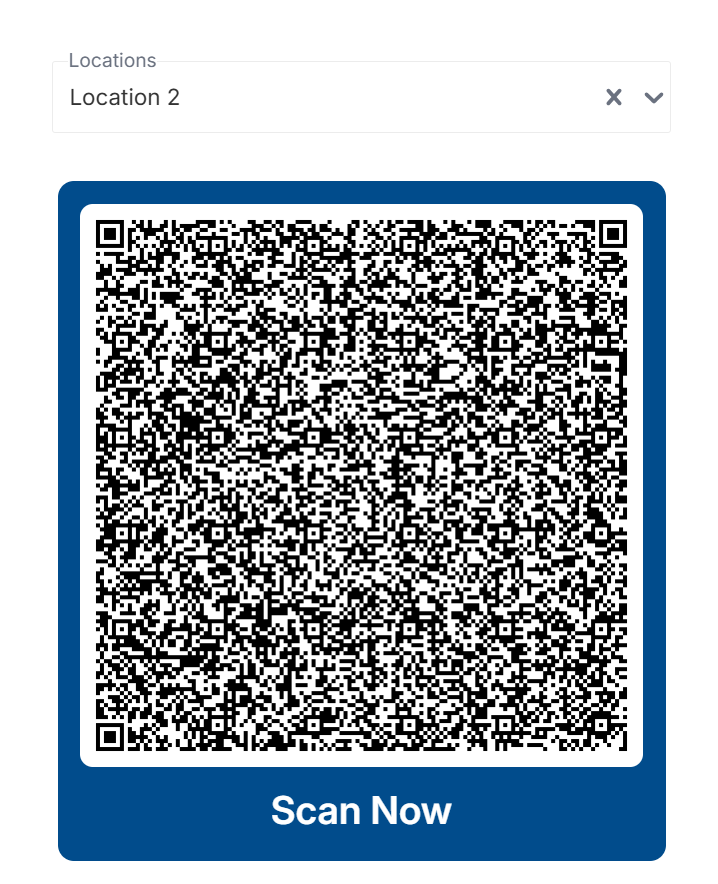
Use the dropdown arrow to see all your available locations, and ensure the correct location is selected
-
Once selected, the login barcode will be displayed, and is ready to be scanned by the HSTA-209 Wi-Fi Inventory Collection app
Logging in with HSTA-209 Wi-Fi Inventory Collection App
-
Open the Vego Inventory application on your HSTA-209. You should see this screen on your HSTA-209:

-
Using the yellow scan buttons on either side of the device, scan the QR code that has been generated on your PC

If you have difficulties with scanning the QR code of your monitor, attempt to hold the HSTA-209 at an upward angle while pointing at the QR code. This will mitigate LED reflections on the screen, preventing the scanner from decoding the login barcode
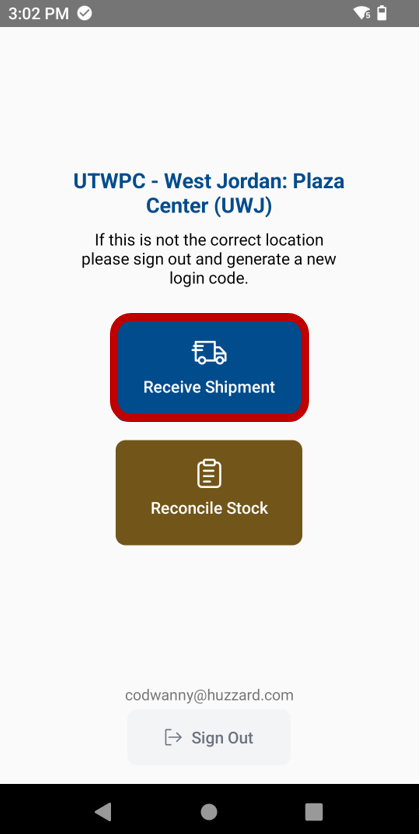
Receiving Shipment
-
Now that we have our PC and HSTA-209 logged in, we can begin receiving a shipment
-
Tap Receive Shipment
-
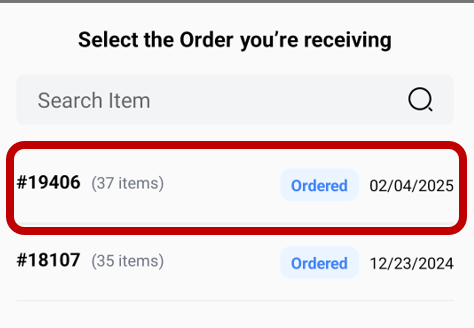
Tap the correct Purchase Order
-
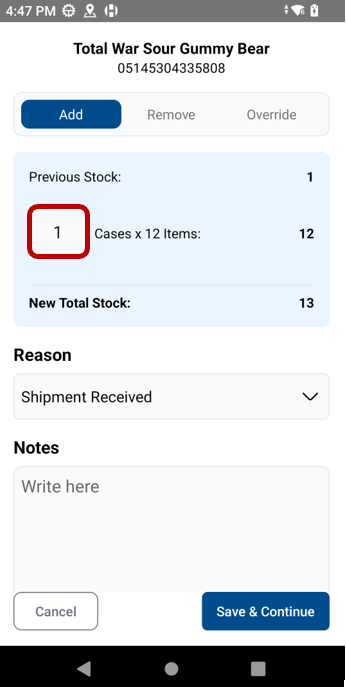
Now you can begin to scan the UPC’s of the items received in the shipment
-
Once a UPC is scanned, the default action will now be set to “Add”, so the number you enter will add to your current stock. To change the number of items being added, tap the box containing a number and type your desired amount. In the screenshot below, we are adding 1 case of an item. Each case we import will result in 12 items being added to our inventory count.
-
Tap “Save and Continue” in the bottom right-hand corner
-
Repeat the scanning and saving until you have scanned all items that came in the shipment
If you scan and receive all items from a purchase order, the P.O.'s status will become “Received”. However, if not all items are received, the P.O.'s status will become “Partially Received”
Editing Scanned Inventory Updates
During a reconciliation or shipment receiving, users have the ability to delete updates prior to saving them. Users have the ability to delete one update at a time or all updates collectively
Deleting Updates one by one
-
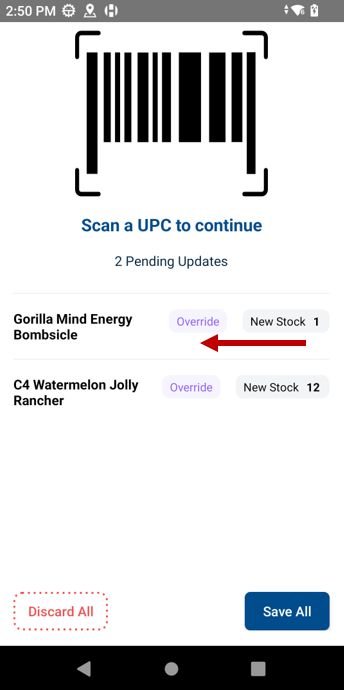
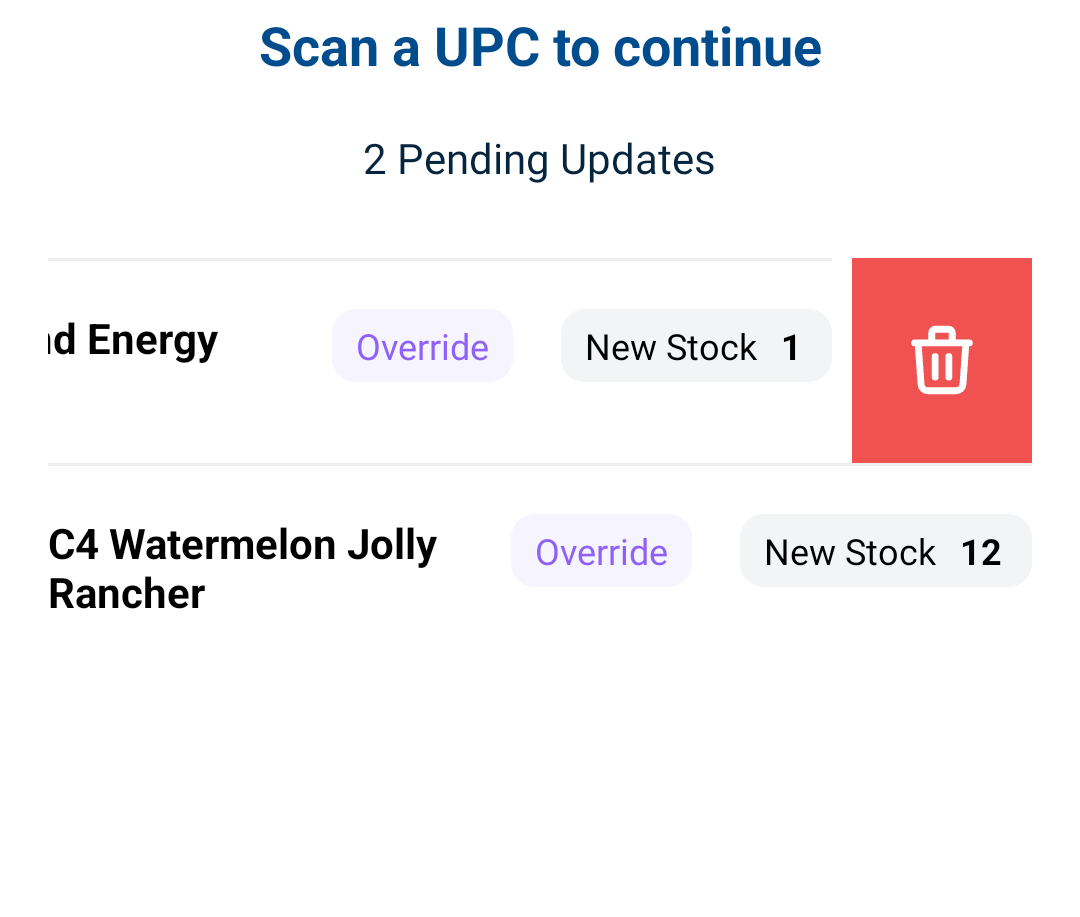
When on the “Scan a UPC” screen, swipe from right to left on the update you wish to delete
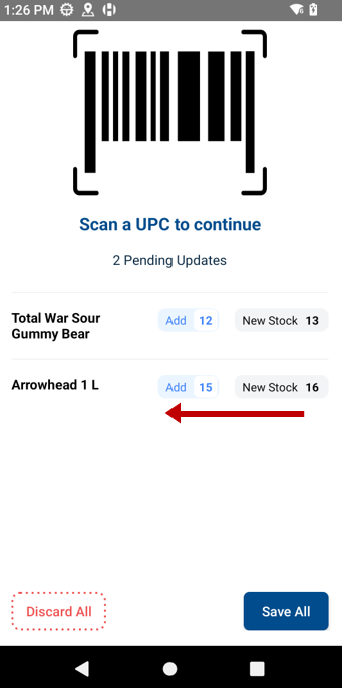
-
This will reveal a trash can icon. Tap on the trash can icon
![Screenshot_20250403-133402[1].png](/__attachments/a_3ad54d95db7cd809124321a889f8d18ac627db3afc8784a3d7ce76f1ae8195d2/Screenshot_20250403-133402%5B1%5D.png?cb=b01ded5e76d2fc18edd133e0c3f07b5e)
-
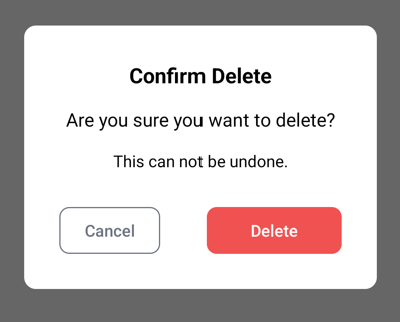
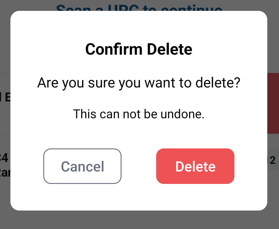
After tapping on the trashcan icon, a confirmation message will appear. Tap Delete
-
You have now successfully deleted a single update from your inventory updates
Deleting all scanned items
-
When on the “Scan a UPC” screen, Click on Discard All
-
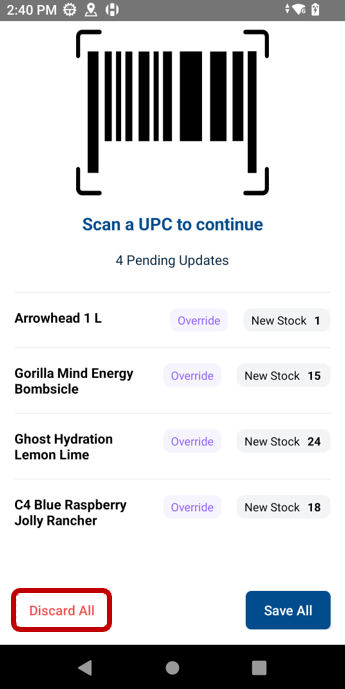
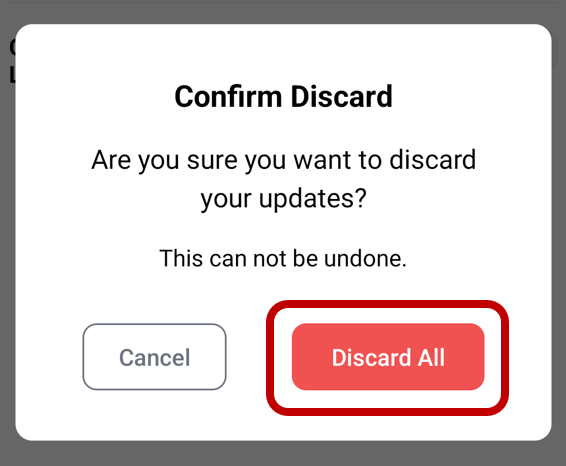
A confirmation message will appear, ensuring that you wish to delete all updates. Tap Discard All
![Screenshot_20250403-134658~2[1].png](/__attachments/a_88aa5e9c1f7f516758d4f5c96a8c9da822a30990d785917711cc85764849f19e/Screenshot_20250403-134658~2%5B1%5D.png?cb=3f98f86bc07719b07dcbb1c4f2d7616b)
-
You have now successfully deleted all your locally saved updates
Saving Changes to Cloud
-
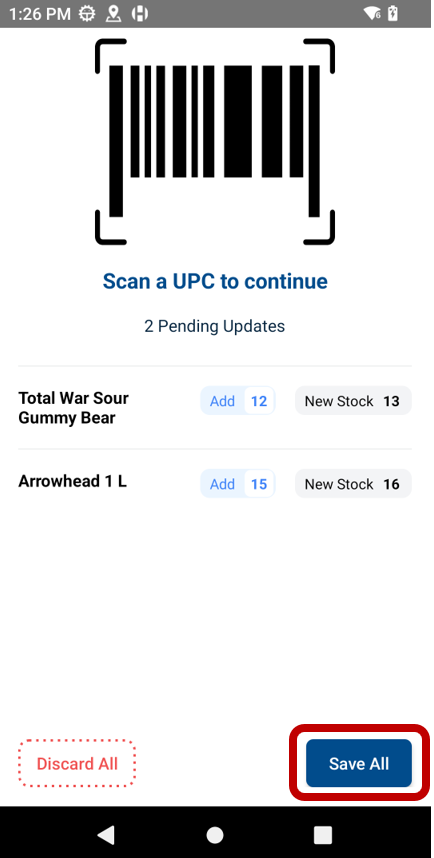
When on the “Scan a UPC” screen, tap Save All in the bottom right-hand corner
-
After tapping Save All, you will be prompted to scan your location QR code again. After scanning the QR code, your inventory will be uploaded to the cloud
-
You have successfully saved your inventory updates to the cloud
Discarding Inventory Changes
Inventory changes can be discarded prior to submission. Individual records can be discarded, or all changes can be discarded at once
Discarding all Changes
-
After scanning any inventory, you can discard your inventory changes by clicking “Discard All” in the bottom left-hand corner
-
To finalize your discarding, click “Discard All”
Discarding Individual Records
-
To discard an individual record, touch and swipe from right to left on the record you wish to delete
-
A trash can icon will then appear. Click the trash can icon
-
Click Delete
-
The individual record will now be deleted from your reconciliation file
![Screenshot_20250402-145242[1].png](/__attachments/a_cf7a144b699c54a2cb49600a9b8a86e057e90cfd0138a20dc80e121a0f2ec916/Screenshot_20250402-145242%5B1%5D.png?cb=77a5f088aa2c3b20db69b791619f93ea)
Back-to-Back Item Scanning
As an alternative to pressing “Save and Continue” between scanning unique items, you can scan the next unique item immediately after you have entered all of the details of the prior item.
Scanning the new item will display the following message, saying that “You’ve scanned a different item”:
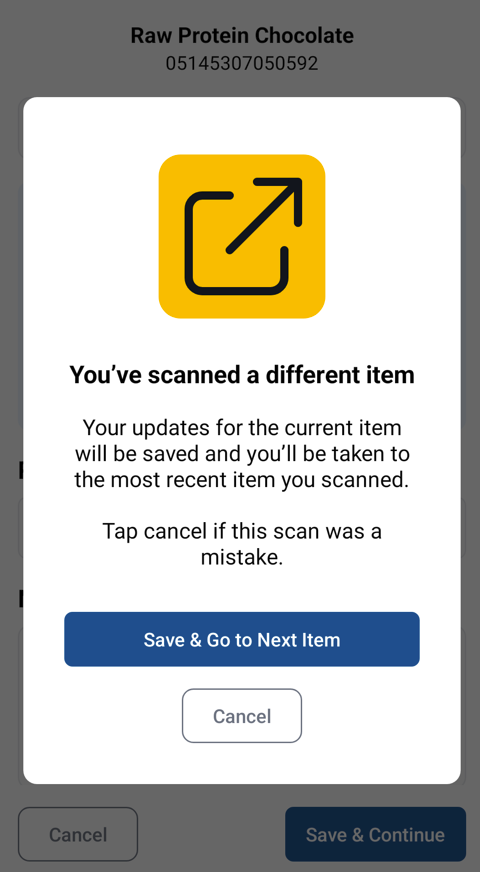
If you select “Save & Go to Next Item”, your previous item will be saved, and you be taken to the edit screen for the new item.
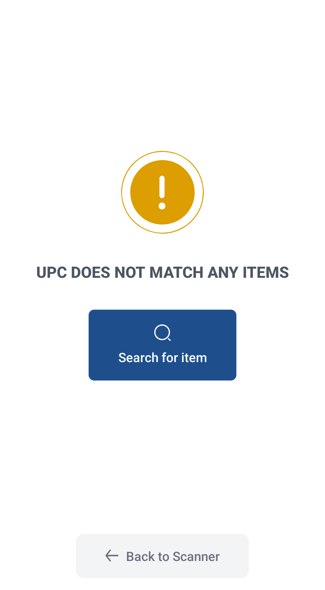
Requesting UPC to be Added to Product
When scanning a UPC that does not yet have an associated item, you will receive the message “UPC Does Not Match Any Items“. If the UPC should be linked to an item, you can choose to search for an item and send a request to add that UPC code to it.
-
After scanning the UPC in question, select the “Search for Item” option
-
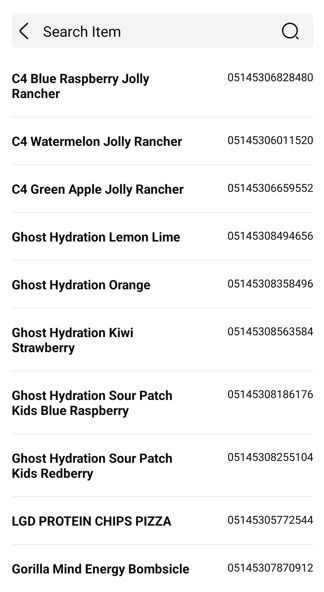
Search for the item that should be linked to the UPC
-
Select the item
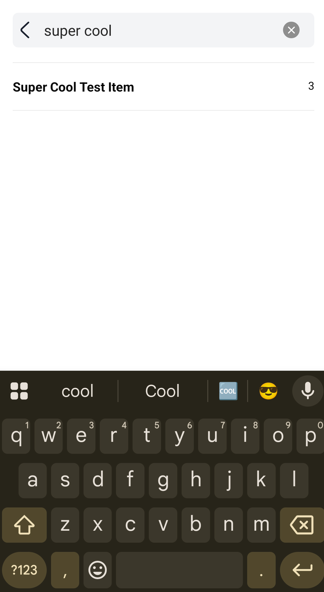
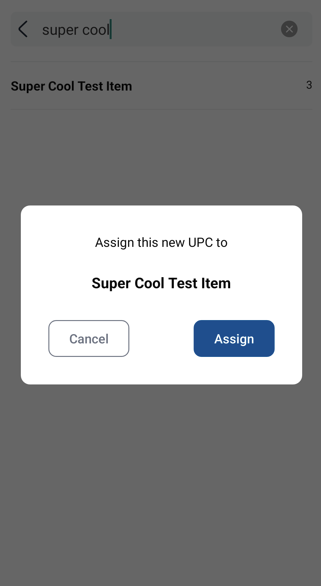
-
Select “Assign”
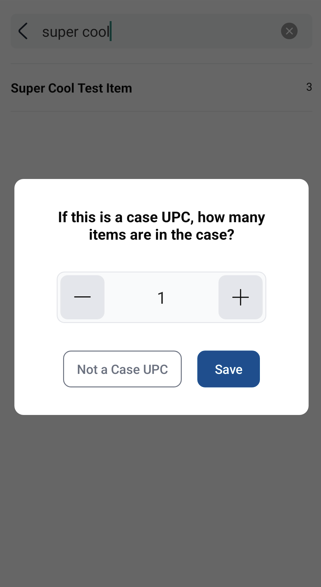
-
Select the quantity in the case and hit “Save”
-
Alternatively, if this is an individual item, select “Not a Case UPC”
-
-
You now have your request:
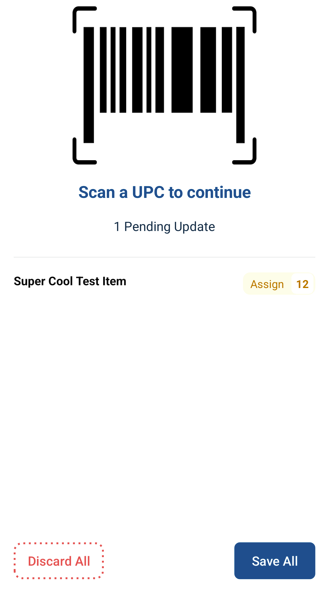
Note: The item will not be received unless you scan the UPC again.
-
You may receive other items or receive that item by scanning the UPC additional times and then Saving Changes to Cloud
-
Once the changes are saved, an admin will be notified of the request to add the UPC to the item