
Providing Screenshots and Recorded Videos
Providing videos and screenshots to us at Vego Inventory can help us troubleshoot any issues that you may experience.
Taking Screenshots on the HSTA-209
In order to take a screenshot with an HSTA-209, press the “volume down” button on the right side and power button on the top at the same time. If successful, you will hear a capture sound and see the screen flash. Then refer to Transferring files your PC from a HSTA 209
Recording Videos on the HSTA-209
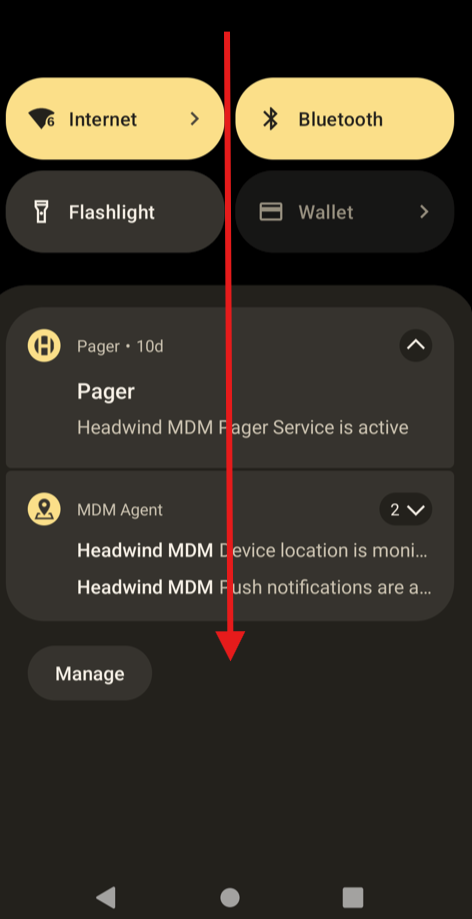
1. When you’re ready to start recording, swipe downward from the top of your screen
-
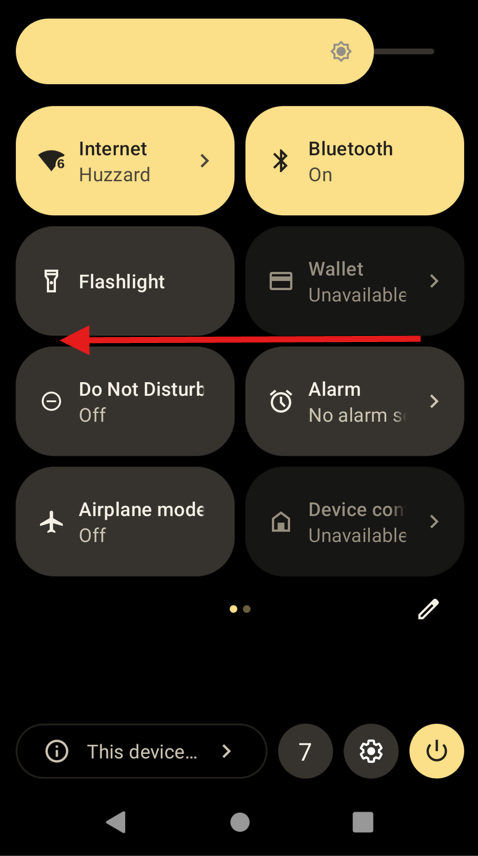
Swipe downward from the top again
-
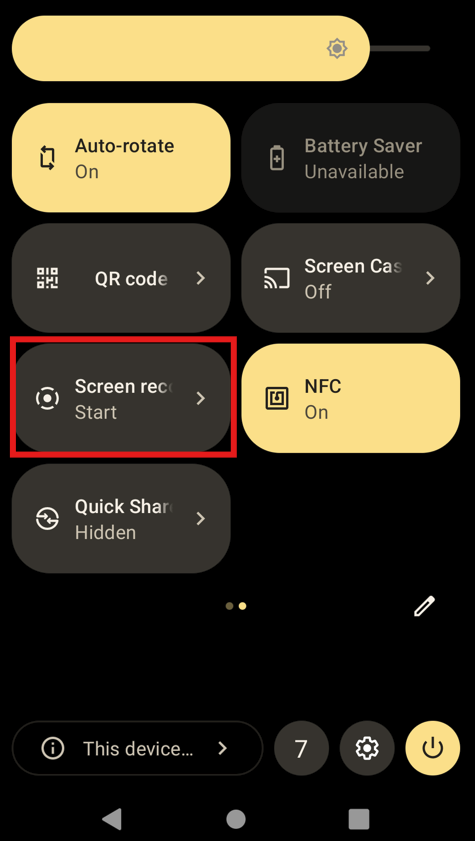
Swipe from right to left in the center of the screen
-
Select “Screen Recording”
-
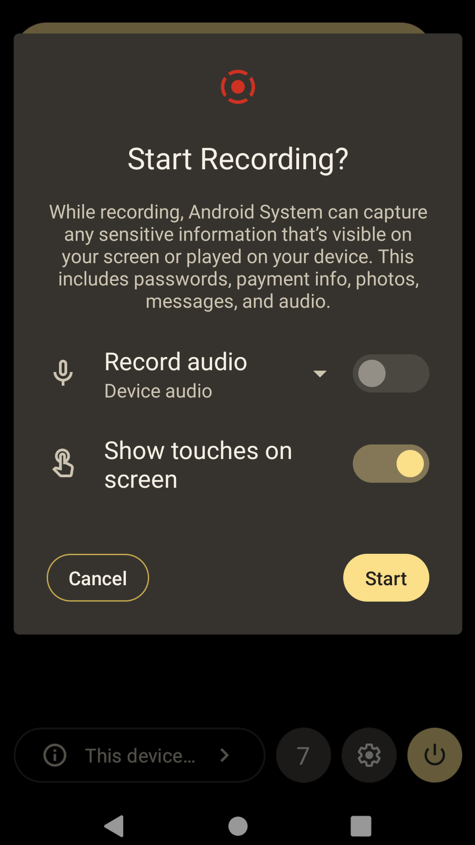
Tap “Show touches on screen” and then tap “Start”
-
Swipe up from the bottom, and you should now see a red circle in the top right, indicating that you are recording
-
Record the issue.
-
Once you are finished, swipe from the top and select “STOP” on the red pop-up
Transferring files to your PC from a HSTA-209
-
Connect the HSTA-209 to your PC via a “USB to USB Type-C” cable
-
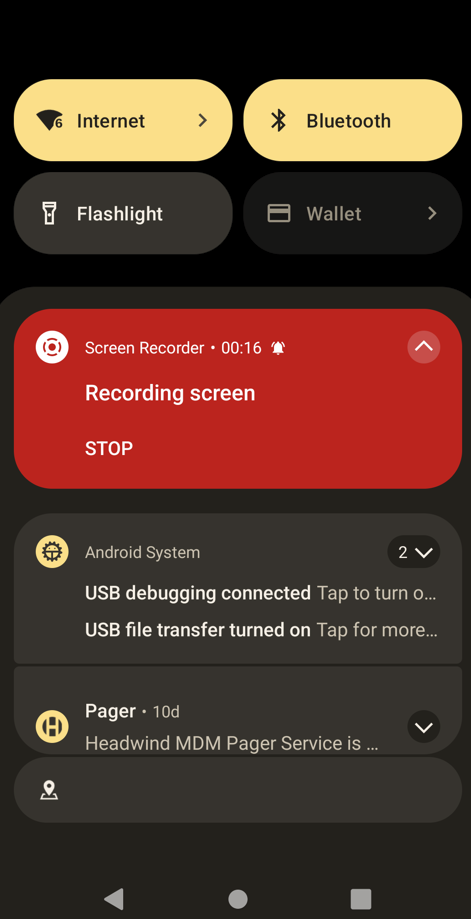
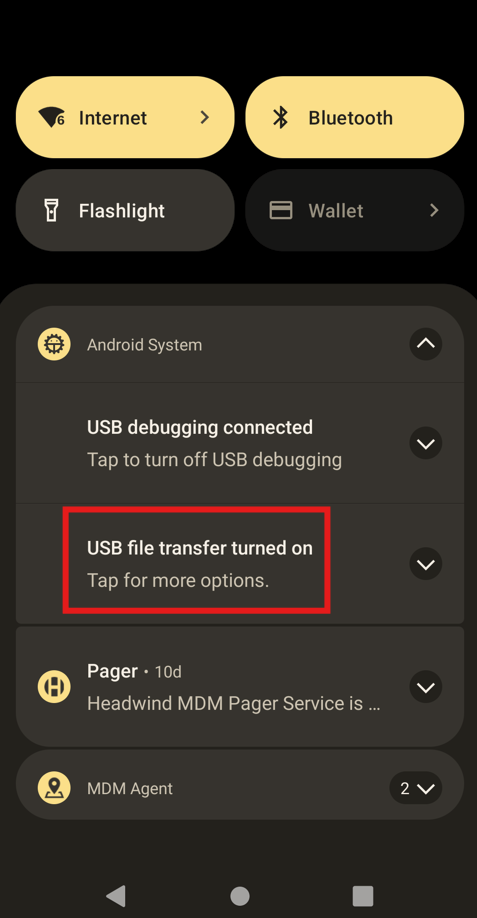
Swipe downwards from the top of the screen
-
Expend the “Android System” dialogue box if needed and select “USB file Transfer turned on”
-
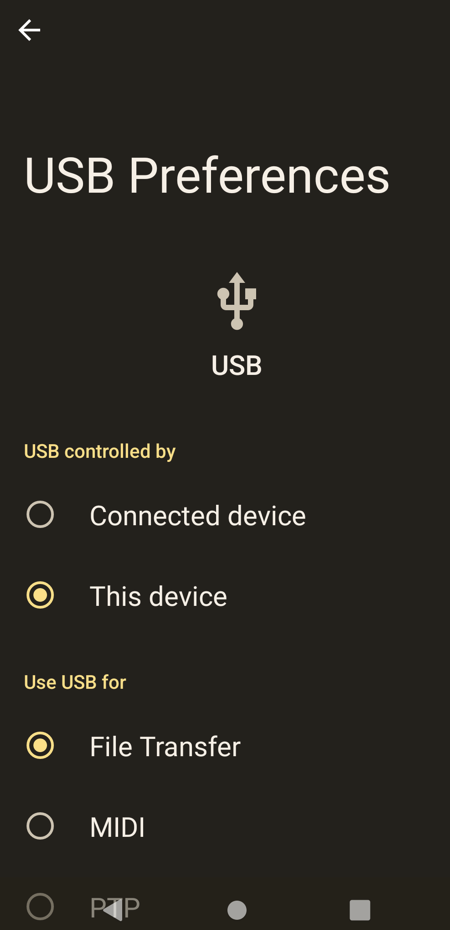
Select “File Transfer”
-
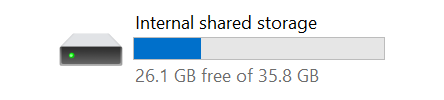
On your PC, go to “File Explorer” or a similar app. Under “This PC”, you should see “TC22” as a new option. Select that

-
Select Internal Storage
-
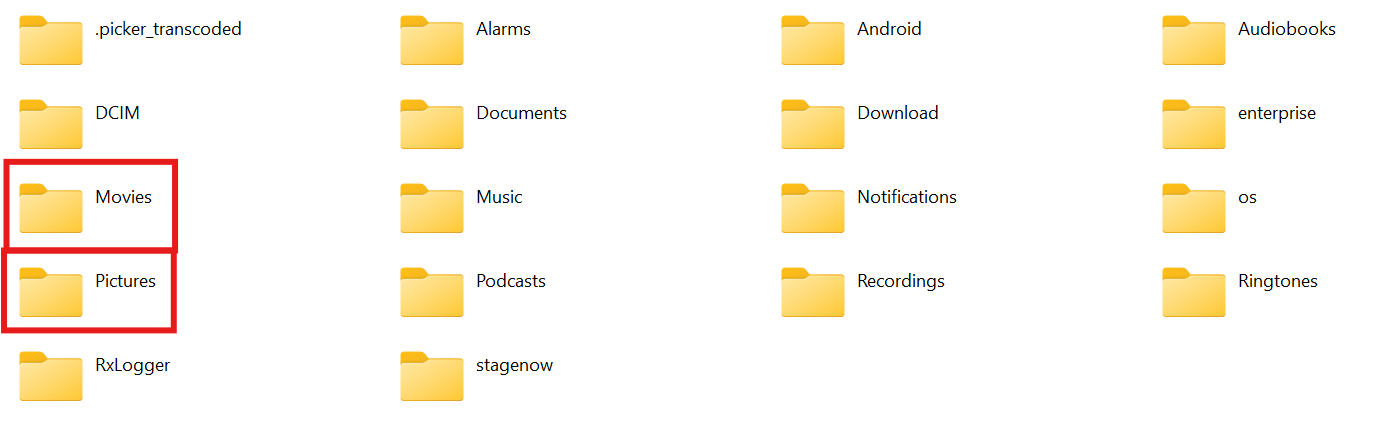
If you are looking for a recording, go to “Movies”. If you are looking for screenshots, go to “Pictures” and then “Screenshots”
-
You have now accessed the file on your PC
Network Connection Errors
Network Error - No Internet Connection
If you are receiving this network issue, here are a few things to check:
Connected to Guest WiFi Network
If your HSTA-209 is connected to a guest WiFi network instead of a primary/main network, Vego Inventory will likely not be able to fully function. Typically, guest networks will have the word “guest” in the name/SSID. However, this is not always the case. If you are receiving a Network Error in Vego Inventory, but are connected to a WiFi network that does not contain the word “guest” in the name/SSID, contact your IT department to determine if the network you are using is a guest network or not.
If you are connected to a guest network, or suspect you are, contact your IT department to get your HSTA-209 connected to your primary/main network.
![Screenshot_20250417-141231[1].png](/__attachments/a_9a6d149ed181f4629164629536aa4eb69617b8cecbf45dd7970de487851ea297/Screenshot_20250417-141231%5B1%5D.png?cb=4ab436780bf50fc0bcdeb62b79498963)
Not being connected to any WiFi Network
If your HSTA-209 is not connected to any WiFi network at all, you will receive this error when attempting to log your scanner in to Vego Inventory. To correct this, follow the instructions to connect your HSTA-209 to WiFi.
Error: Something went wrong on our server. Please try again later.
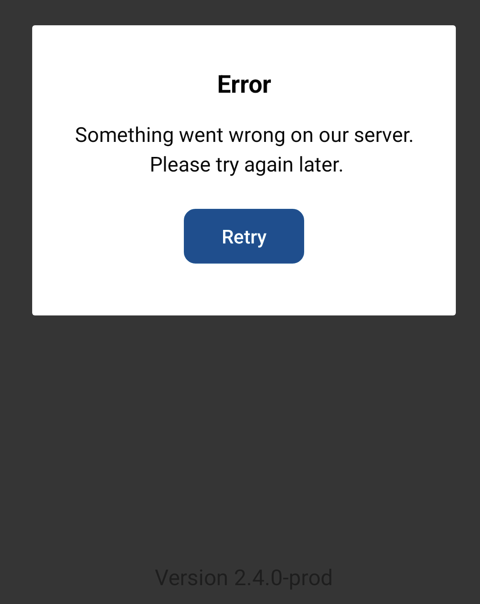
This error message can display after scanning the QR code on your PC in order to log in. There are two known causes of this error:
-
If the web browser you are using for the QR code has not been refreshed:
-
In order to resolve the issue, refresh the browser and generate a new QR code.
-
-
If your device is experiencing connection issues, even though your PC is not:
a. You will see symbols such as the following on your device, indicating connection issues:

b. In order to resolve the issue, follow the steps for forgetting and reconnecting to a network.
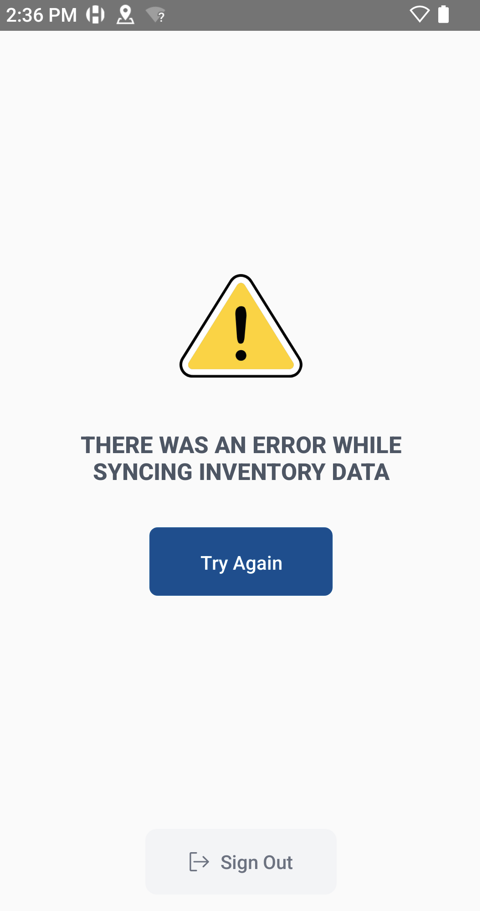
THERE WAS AN ERROR WHILE SYNCING INVENTORY DATA
Not having a Consistent Connection Throughout the Building
If you’re able to log in to the scanner via the QR on your PC but receive the error, “THERE WAS AN ERROR WHILE SYNCING INVENTORY DATA” when selecting an order to receive under “Receive Shipment” or selecting “Reconcile Stock”, it may be that the internet connection throughout the store is inconsistent. This is especially likely to be the cause of this error if you see that the signal icon on the top right of the screen is empty when it occurs, indicating that the device does not currently have connection.
Try attempting to select reconcile or select an order to receive while still near the PC. You won't need an internet connection between that initial syncing and scanning the QR at the end, so the inconsistent internet connection in the rest of the building should not impact your process beyond needing to initiate (and save at the end of the process) near the PC.
Network Connection Consistently Displays empty or with an “X”
.png?cb=88ec3278183af1450f1690646b4f6c1a)
.png?cb=17f2d871473f1093939604d08085ff99)
The steps to resolve this issue are:
1. Try Forgetting the Network and Reconnecting
-
Swipe down from the top of the Android device
-
Select “Internet” towards the top left
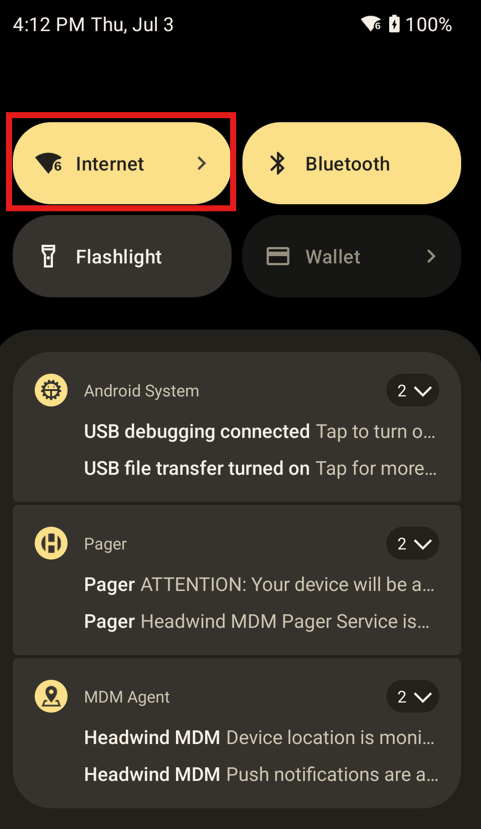
-
Select the gear next to the highlighted network
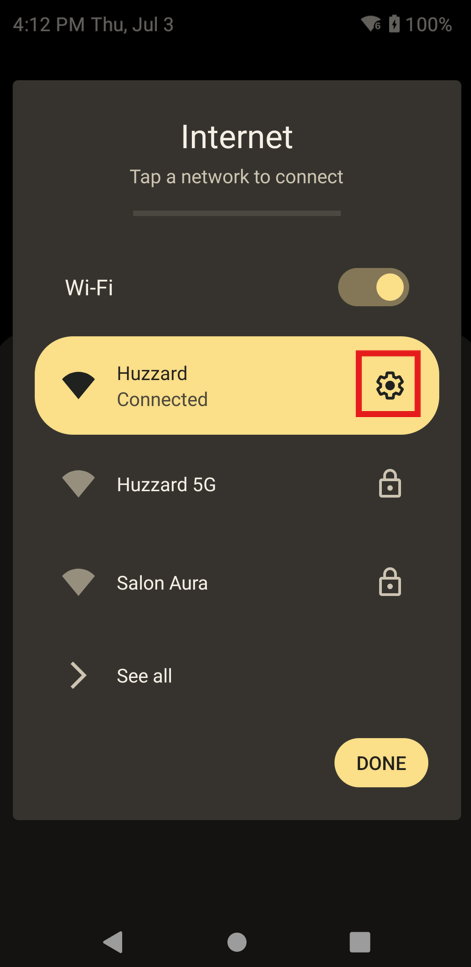
-
Make note of which network this is and then select “Forget”
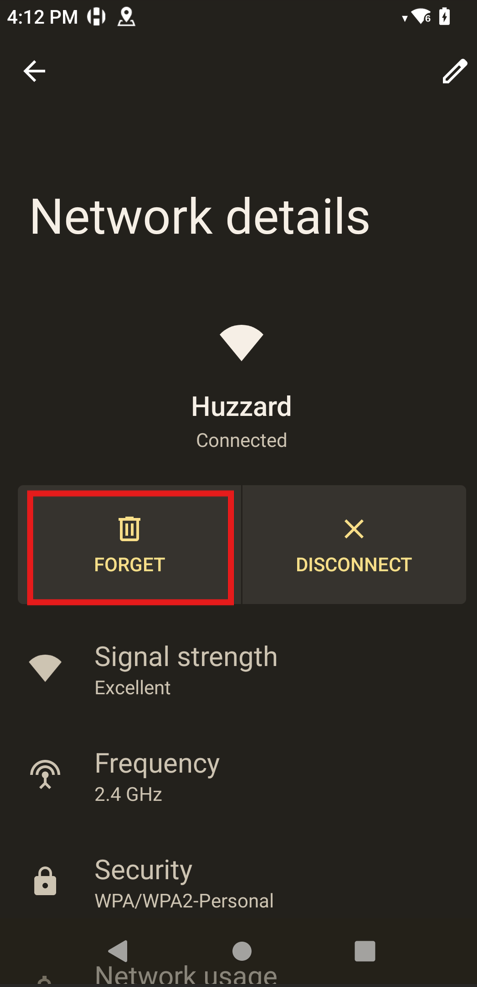
-
Repeat steps 1 and 2, select that same network from the list, and reconnect
-
At this point, test if your connection issues are resolved
2. Contact Your Internal IT Support Team if Problems Persist
Miscellaneous Errors
"XXX Errors. The following updates failed to sync" error

If you encounter this error at the end of your reconciliation or shipment receival, please open a Vego Inventory ticket so that we can assist you in determining the root cause.
If you encounter this error, DO NOT continue to press try again. Doing so may lead to replicated adjustment or received order records, creating inaccurate data. If you have already hit the try again button, please include that information on the ticket you create for us.
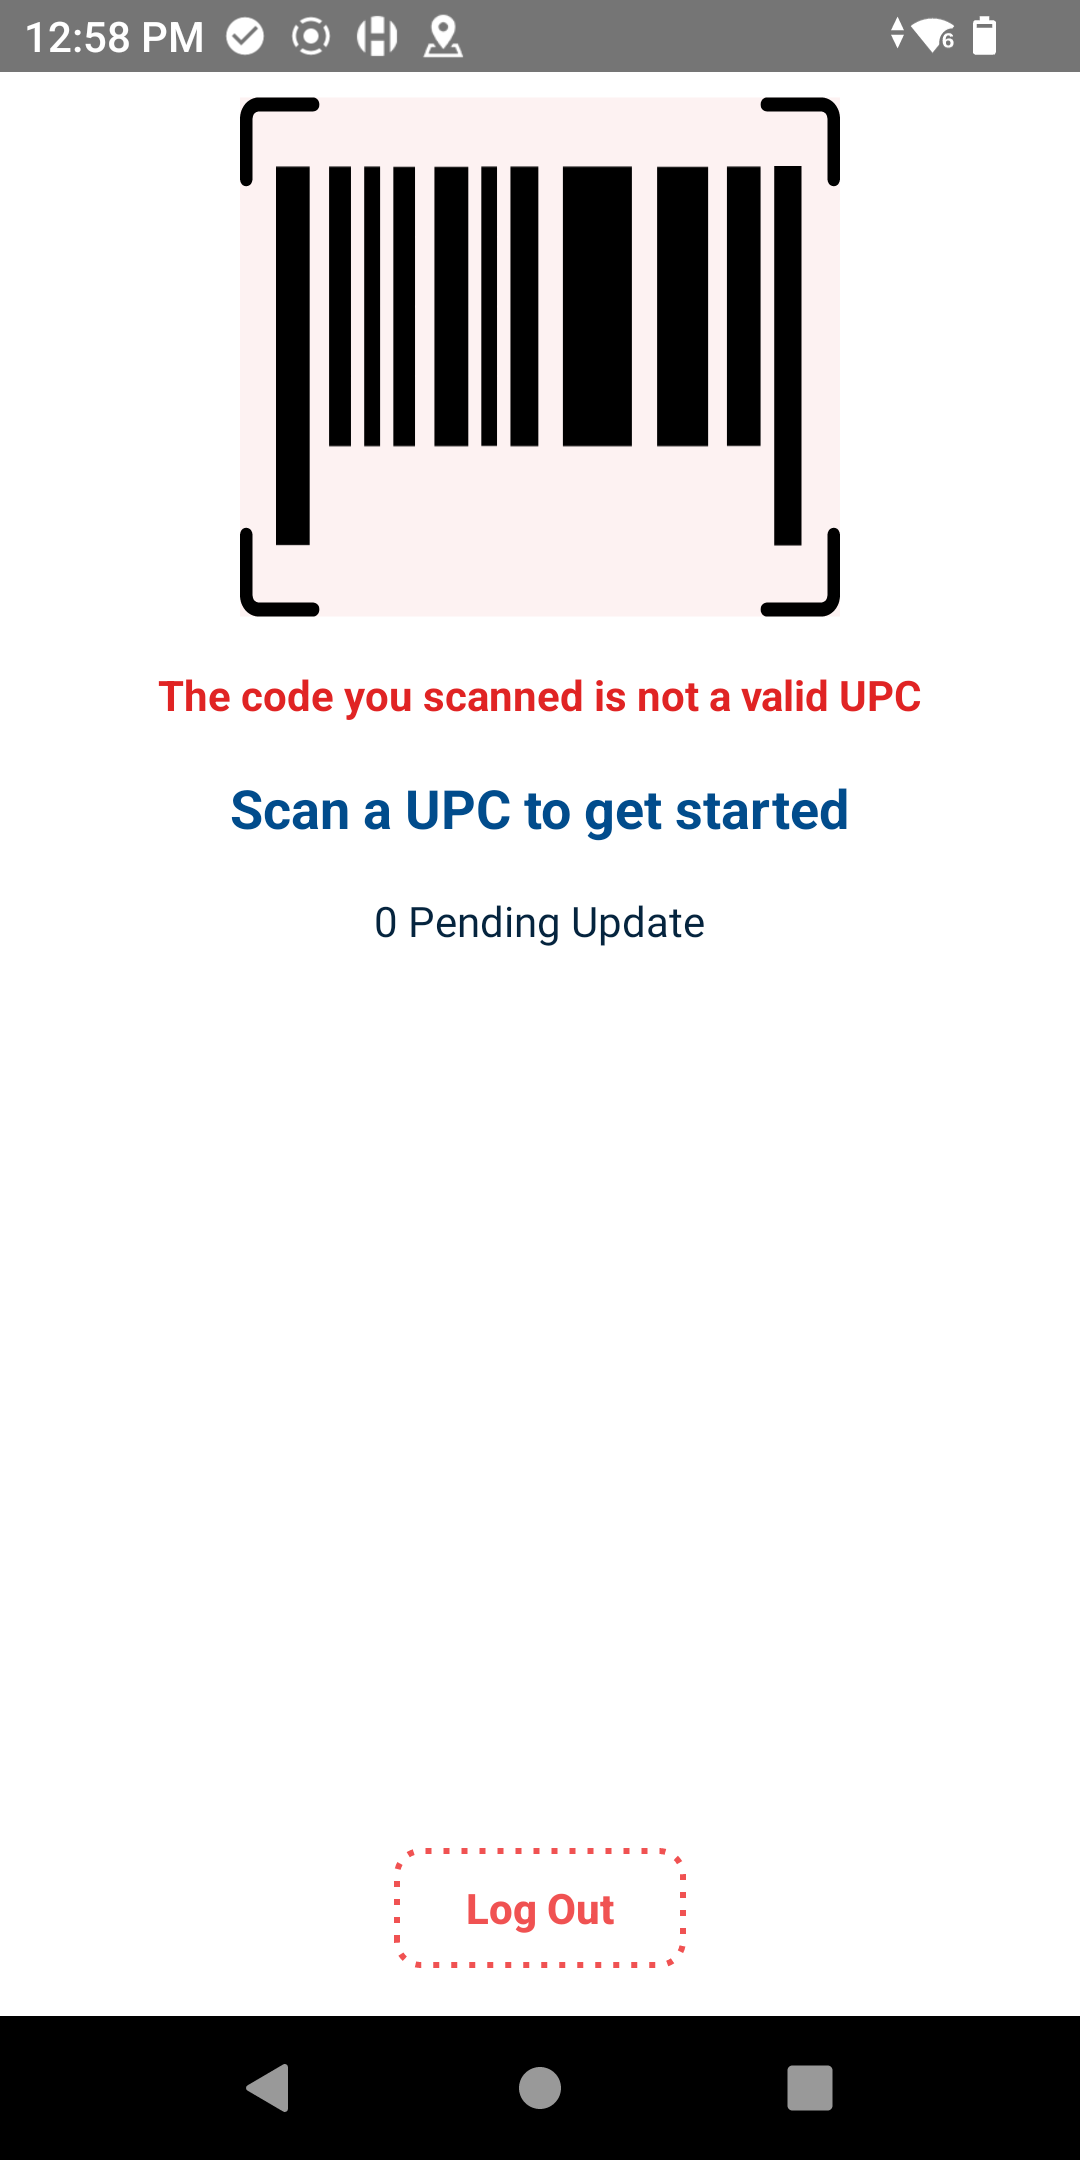
The code you scanned is not a Valid UPC
This error is most likely to occur when you scan the Web browser’s QR code prior to selecting “Save All” but will occur anytime you scan a barcode other than a valid UPC barcode during a reconciliation or shipment receival.
|
Format |
Example |
|---|---|
|
UPC-A |
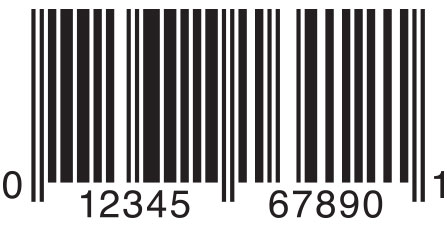
|
|
UPC-E |
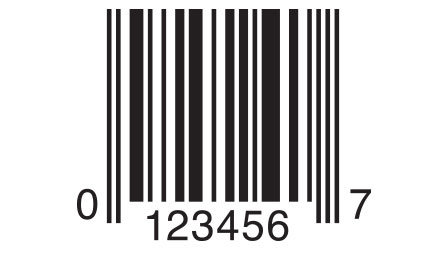
|
|
EAN-8 |
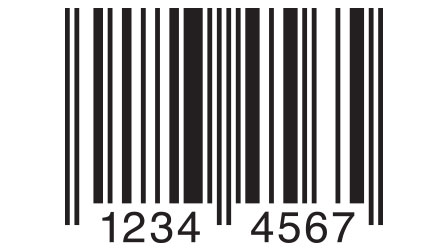
|
|
EAN-13 |
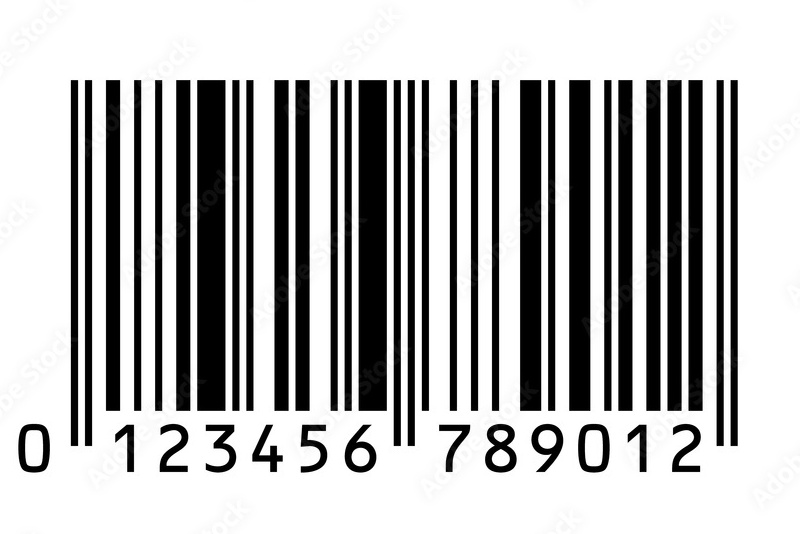
|
UPC Does Not Match Any Items
This message means that the barcode scanned is a valid barcode, but not yet linked to any items.
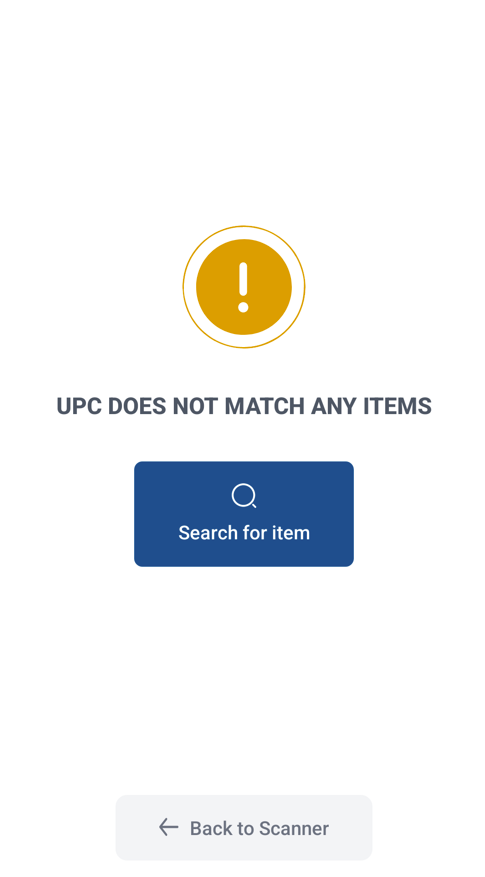
If the UPC should be linked to an item, you can follow this link to Request a UPC to be added to an item.
Trying to Save Inventory to a Different Location than Originally signed into
At the end of performing a Reconciliation or receiving an order, if you scan a different location’s QR code than the one you used to log into the mobile device, you will encounter the error message “The code you’ve scanned is for a different location. Please select the correct location and scan again.”
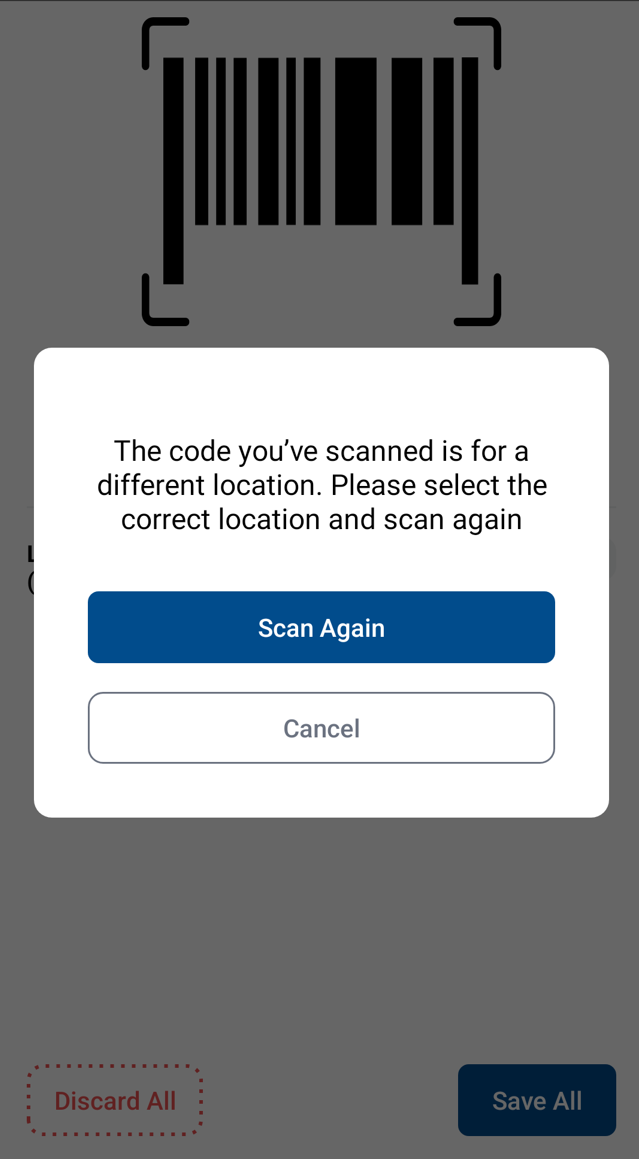
In order to continue, you will need to scan the same location code as you originally signed in under.
If you instead wish to do reconciliation for the location you are now trying to scan, you will need to select “Discard All”, sing out of the mobile device, and log back in using the new location code.
Trying to Save Inventory for a Different User than Originally signed into
At the end of performing a Reconciliation or receiving an order, if you scan a different user’s QR code than the one you used to log into the mobile device, you will encounter the error message “The code you’ve scanned is for a different user. Please select the correct QR and scan again.”
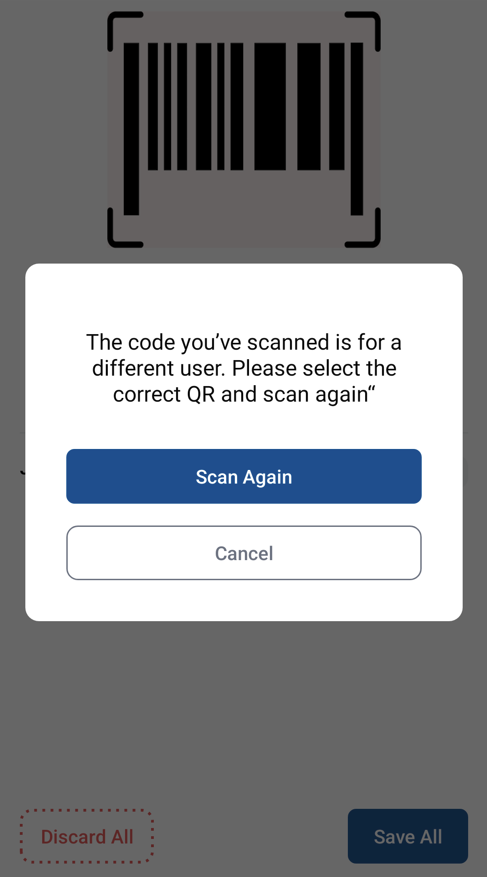
In order to continue, you will need to scan the same user code as you originally signed in under.
If you instead wish to do reconciliation for the user you are now trying to scan, you will need to select “Discard All”, sing out of the mobile device, and log back in using the new user’s QR code.