
Vego Inventory features the ability to place purchase orders directly from the web application. Purchase orders can be placed using the items that are currently defined in your organization by your organization's admin. When a purchase order is requested, operations managers and district operations managers for that location will be notified via email.
Explore the following topics about Purchase Orders:
Viewing Purchase Orders
-
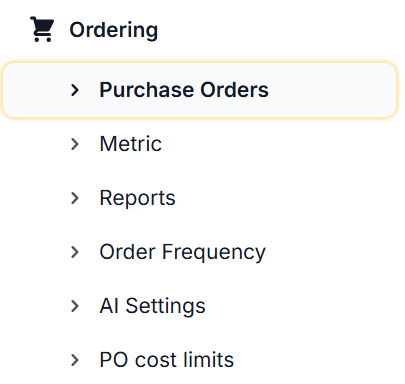
From the Dashboard, select Ordering and click Purchase Orders
-
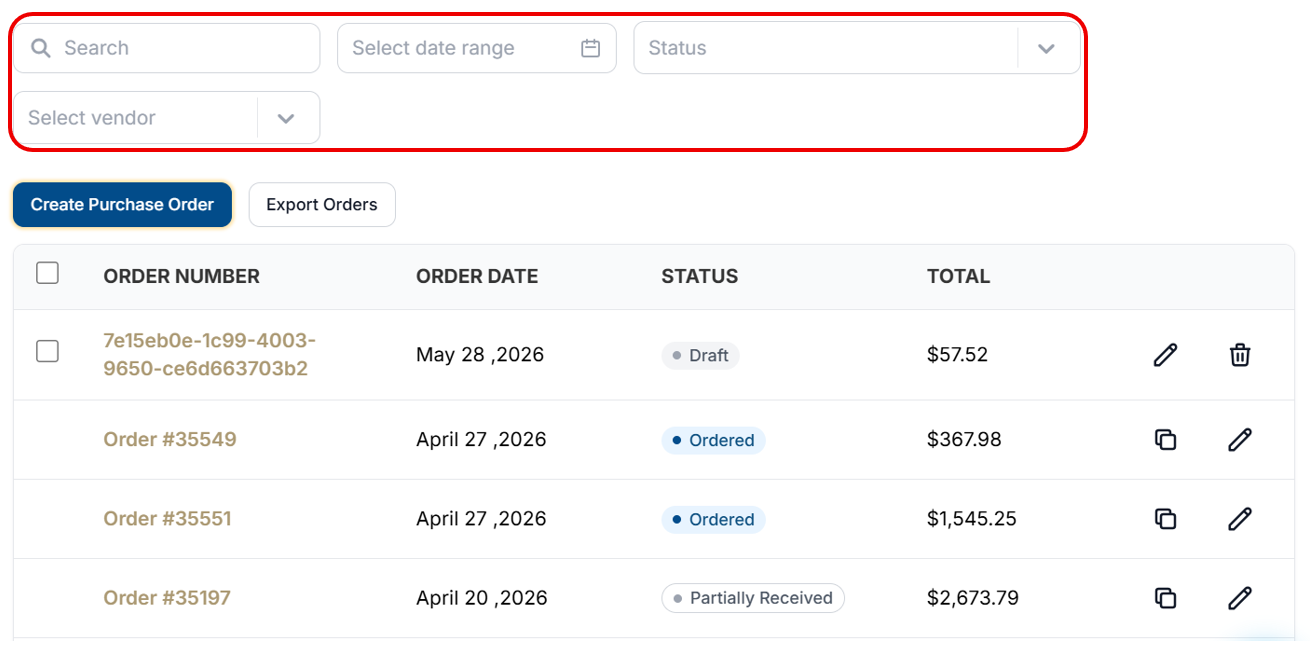
Once in the Purchase Orders tab, all purchase orders for the location will display. There are multiple table columns that will be shown
-
Order Number – The order number for the requested purchase order. This will be a random placeholder value until the purchase order is submitted. When the purchase order has been successfully sent to a vendor and has been approved by the vendor, the order number is updated to match the vendor’s order number that is created in their system.
-
Order Date – The date the purchase order was requested
-
Status – The current state of the purchase order
-
Total - Total cost of the purchase order.
-
-
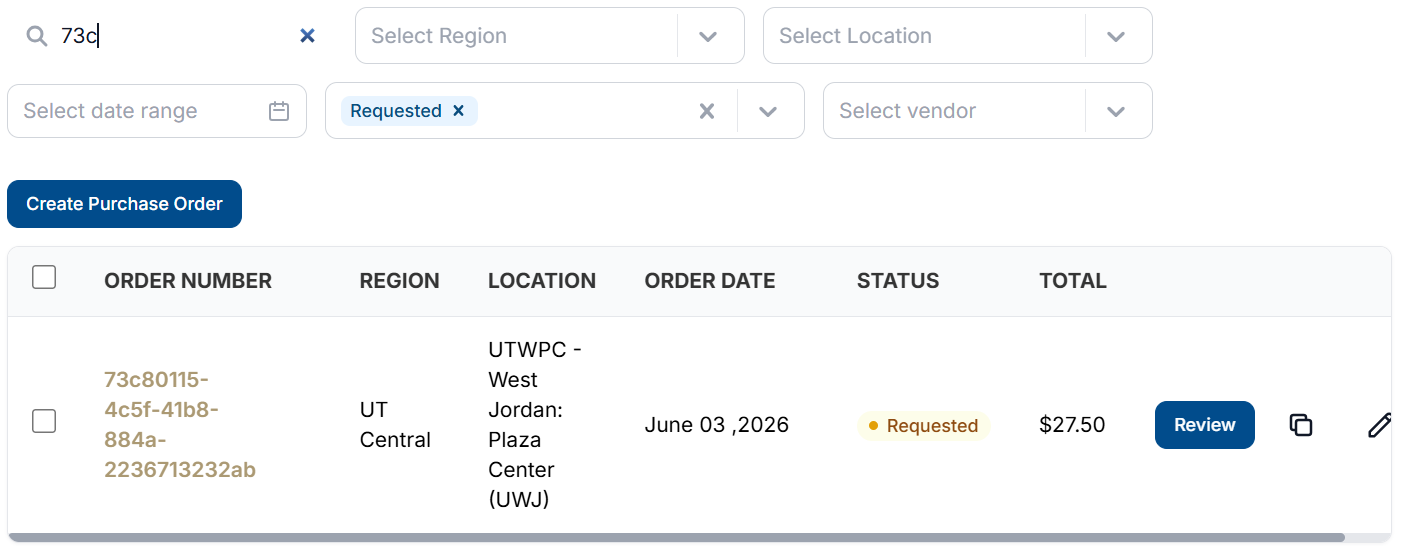
Find the Purchase Order you would like to view. Purchase orders are automatically sorted by date. However, you can use the search bars at the top of the menu to find specific Purchase Orders easily
Purchase orders will not be assigned an order # until they have been approved and received by the vendor. New purchase orders will have a random placeholder value until the purchase order is submitted.
-
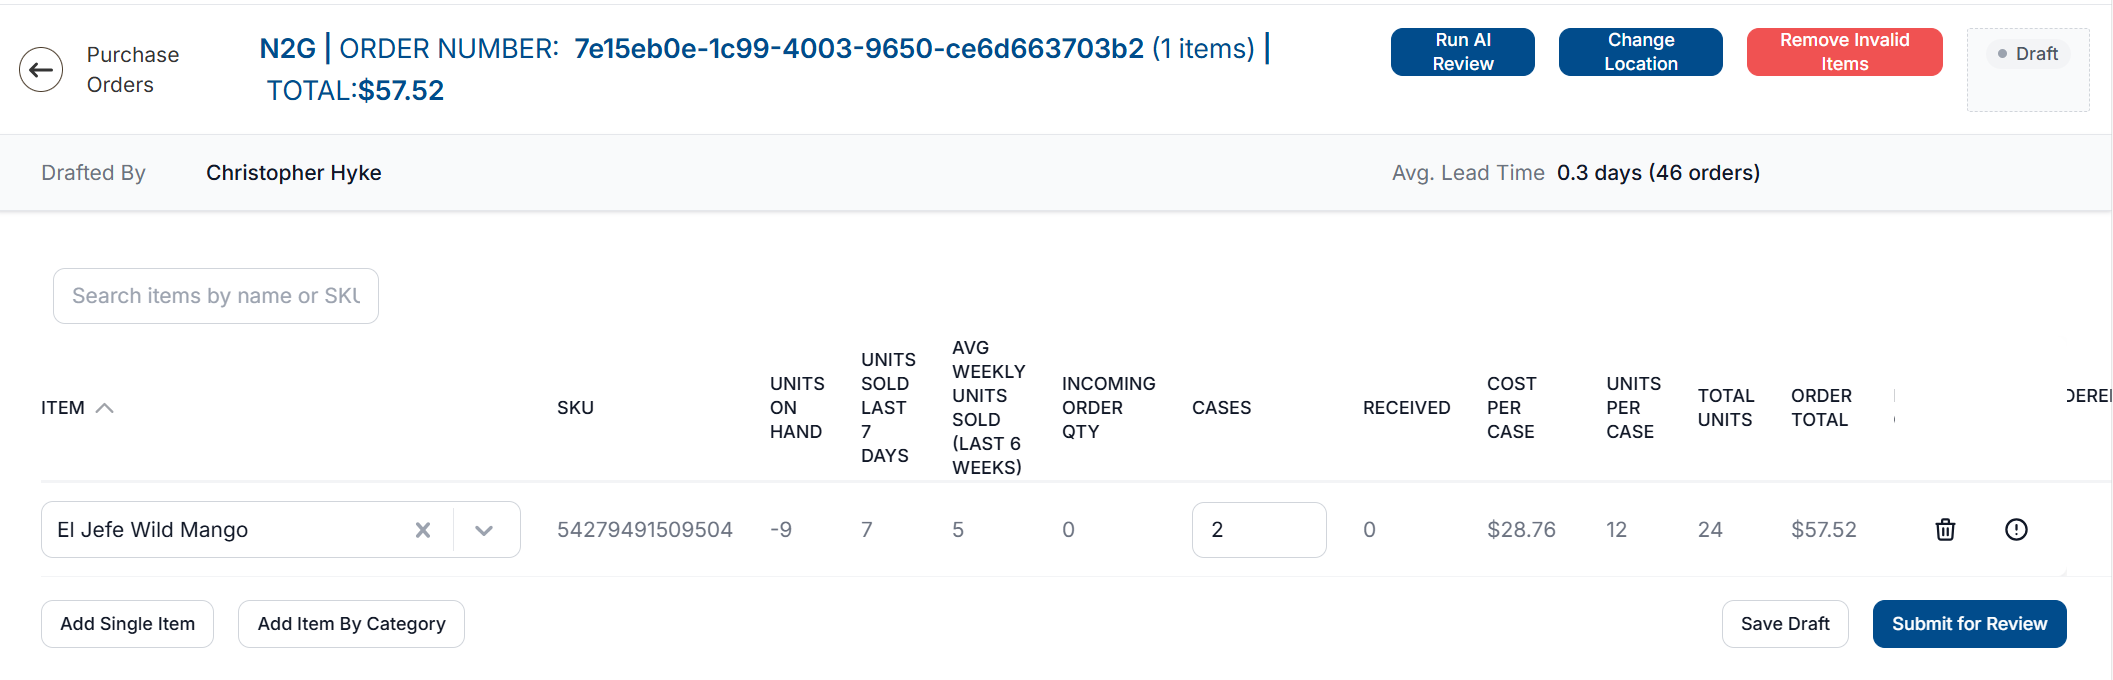
To view the contents of a Purchase Order, click the Order Number

-
The menu that opens up contains all data related to the Purchase Order
-
If changes need to be made to a Drafted Purchase Order, that can be done from this menu. Once complete, click Save Draft

-
If changes need to be made to a Requested purchase Order, that can be done from this menu. Once complete, click Submit for Review for the changes to be submitted.

Purchase Order Statuses and their Definitions
|
Purchase Order Status |
Definition |
|---|---|
|
Draft |
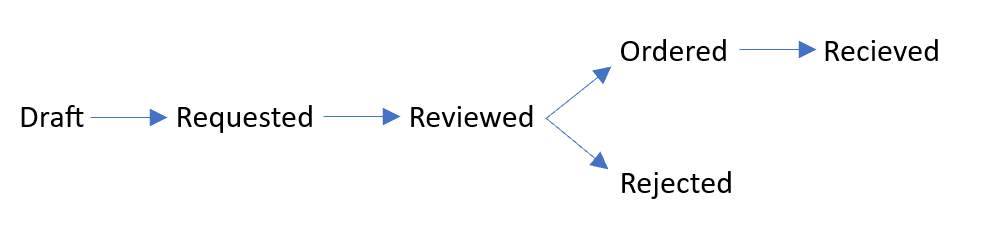
A Draft is a work in progress. Drafts can be saved for later or discarded entirely. Once you are ready to have your purchase order looked over by a reviewer, you must submit your draft. |
|
Requested |
After submitting a draft, it becomes a requested purchase order. Requested purchase orders are waiting for a reviewer to look over them and make a determination if they should be ordered or rejected. |
|
Ordered |
An Ordered P.O. means that a purchase order has been approved by a reviewer and sent to the supplier. Now the ordering location is waiting to receive the shipment of goods. |
|
Rejected |
A Rejected P.O. is a purchase order that was requested, but then it was determined by the reviewer to not be beneficial, and thus should not be ordered. |
|
Received |
A received order is an order that has been delivered by the supplier, and the items from the order have been imported into Vego Inventory. |
|
Partially Received |
A partially received order is an order that has had some of the items delivered and imported, but not all. If you ordered 5 of an item, but only 4 showed and were imported, the order would be considered “Partially Received”. |
Filtering Purchase Orders
In Vego Inventory, filtering the Purchase Orders streamlines the process of finding the purchase orders you need. A combination of filters can be combined to further refine your search.
To filter Purchase Orders;
-
Access the Purchase Orders menu tab on the left side of the screen
Filtering by Order ID
Filtering by Order ID allows you to see Purchase Orders with a matching full or partial purchase order number.
-
Select the Search field, and enter a full or partial purchase order number
Filtering by Date Range
Filtering by Date Range allows you to only see purchase orders created between two Dates.
-
Select the Date Range field, and select a start and end date in the calendar
The start and end dates are included in purchase orders that are returned.
Filtering by Status
A Purchase Order will flow through a progression of statuses during its lifecycle. Filtering by Status allows you to see purchase orders that are in specific phases of their lifecycle
-
Select the Status field, and select each of the Statuses you want to view
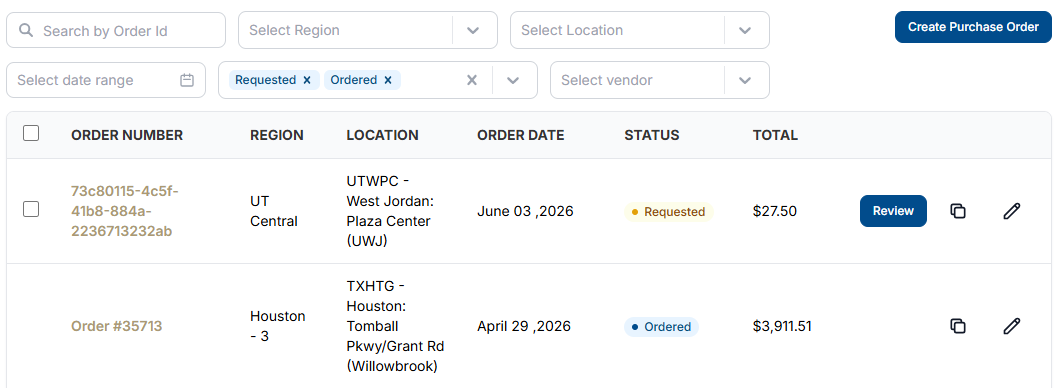
The Requested POs page has the Requested status filter applied by default.
-
To remove a Status filter, select the X next to the status, or select the X next to the status field to clear all statuses.

Filter by Vendor
If an organization utilized multiple vendors, you can also filter purchase orders by one specific vendor.
This option may not be available if you organization does not have multiple vendors assigned.
-
Select the Select Vendor dropdown and select the vendor you want to view purchase orders for
Creating new Purchase Order
Creating a new purchase order in Vego Inventory is simple.
-
Access the Purchase Orders menu tab on the left side of the screen
-
Select the Create Purchase Order
-
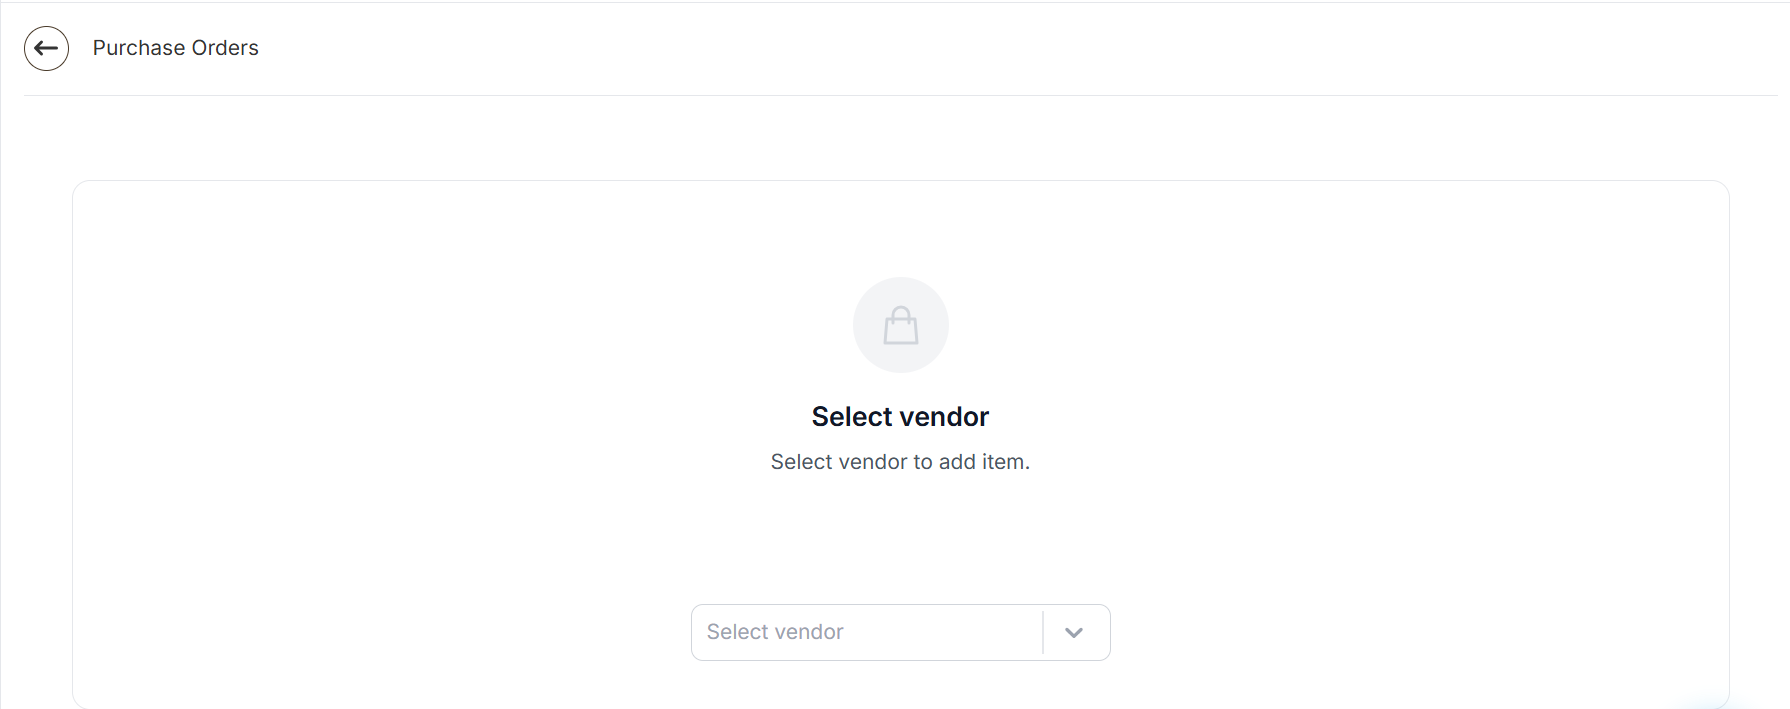
If your organization is assigned multiple vendors, a screen to select a vendor will appear. Select a vendor from the dropdown to continue
-
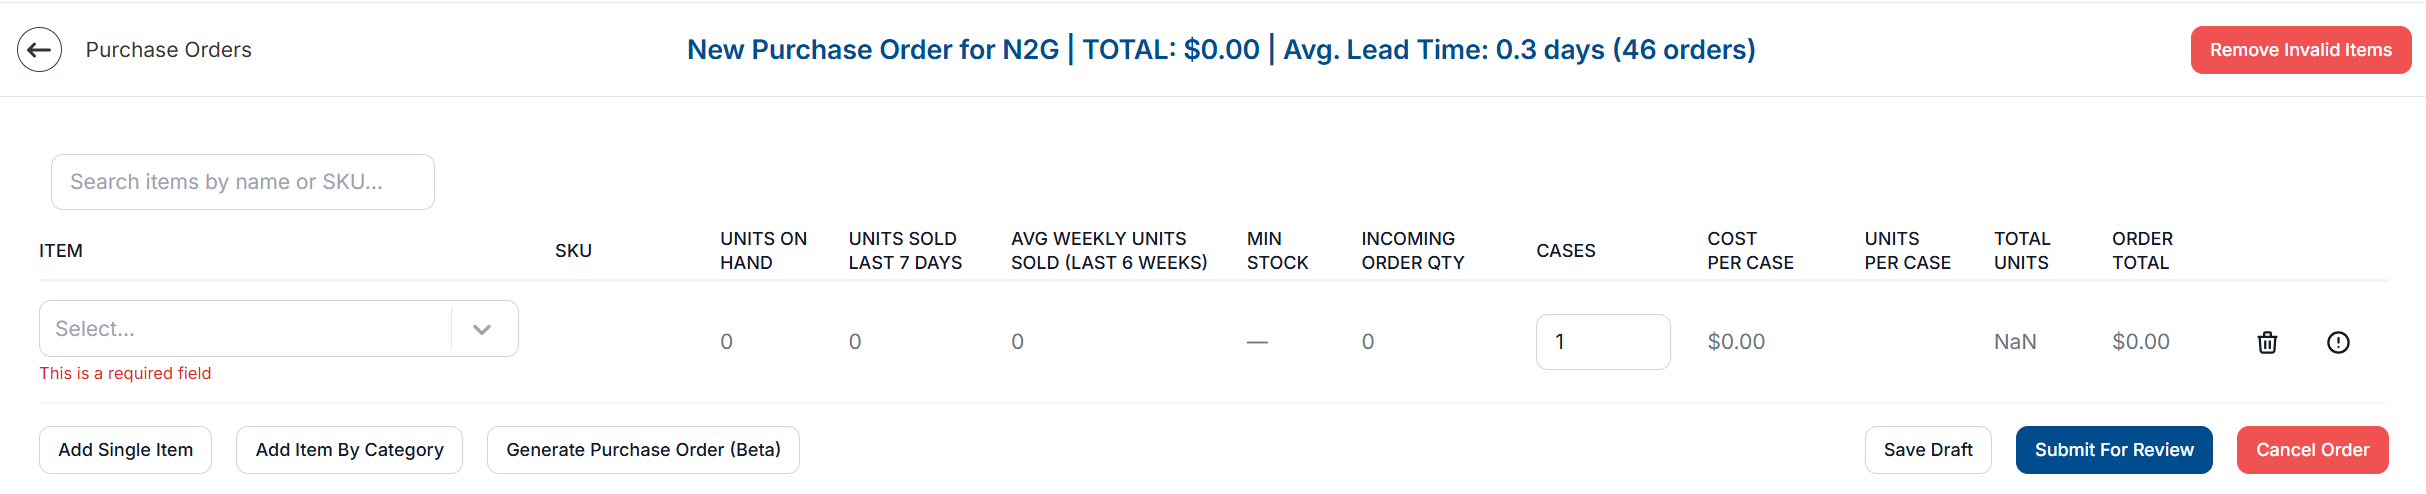
A new purchase order will display on the screen
Adding Item(s) to Purchase Order
There are three methods for adding items to a purchase order:
-
Adding a single item
-
Adding items by category
-
Generate Purchase Order (Beta)
Adding a Single Item
To add a singular additional item to the purchase order, select the Add Single Item button at the bottom of the already added item(s). A new line will appear for the item.

-
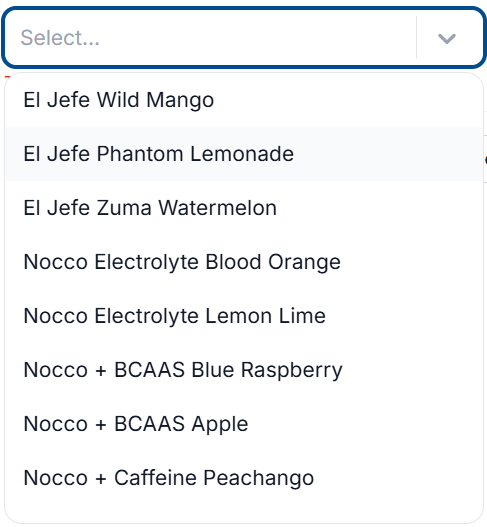
In the Item column, select the empty dropdown labeled Select… to display a list of the items available for purchase in your organization
-
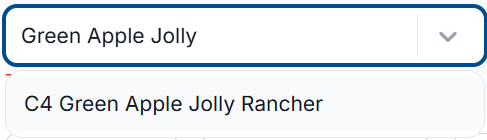
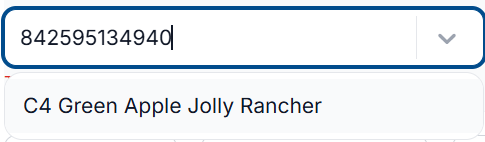
While the dropdown is active, you can type to filter by matching item names, or you can look up an item by its UPC number
-
Click on the item you want to add to the purchase order
-
Once an item is selected, the following information about the item will display
|
Column |
Meaning |
|---|---|
|
SKU |
SKU of the product |
|
Units on Hand |
Quantity of product in inventory |
|
Units Sold Last 7 Days |
Number of units sold in the last 7 days |
|
Avg Weekly Units Sold (Last 6 Weeks) |
Average number of units sold in a week, based off 6-weeks of sales data |
|
Min Stock |
Minimum quantity of product that should be in stock (set by Organization Admin) |
|
Incoming Order Qty |
Number of cases currently on order for the product |
|
Cases |
The number of cases that are to be purchased on the purchase order |
|
Cost per case |
The cost of the item to purchase for the organization |
|
Units per case |
The number of individual units that are received when a case is purchased |
|
Total Units |
The total amount of units that will be received. Calculated by multiplying Cases by Units Per Case |
|
Order Total |
The total cost for purchasing. Calculated by multiplying Cases by Cost Per Case |
Adding Items by Category
-
To add all items within a specific category, select Add Item By Category

-
A model will display, asking which category items you want to add to the purchase order. Select the Category dropdown and select the Category you want to add to the purchase order.
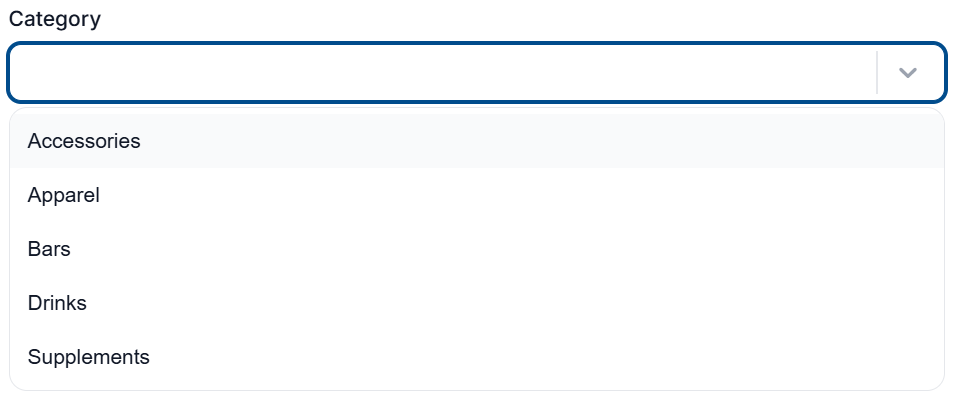
-
You can add multiple categories by re-selecting the Category dropdown and selecting another category.
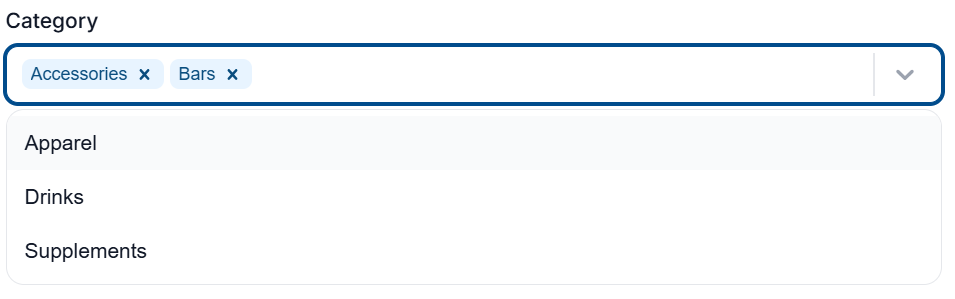
-
Once you have selected the category of items you want to add to the purchase order, click OK
This will add ALL items assigned to each category selected, including invalid, and items out of stock at the vendor.
To quickly remove these items, see the Remove Invalid Items section
-
You will now see that all items within the selected categories will be added to the purchase order
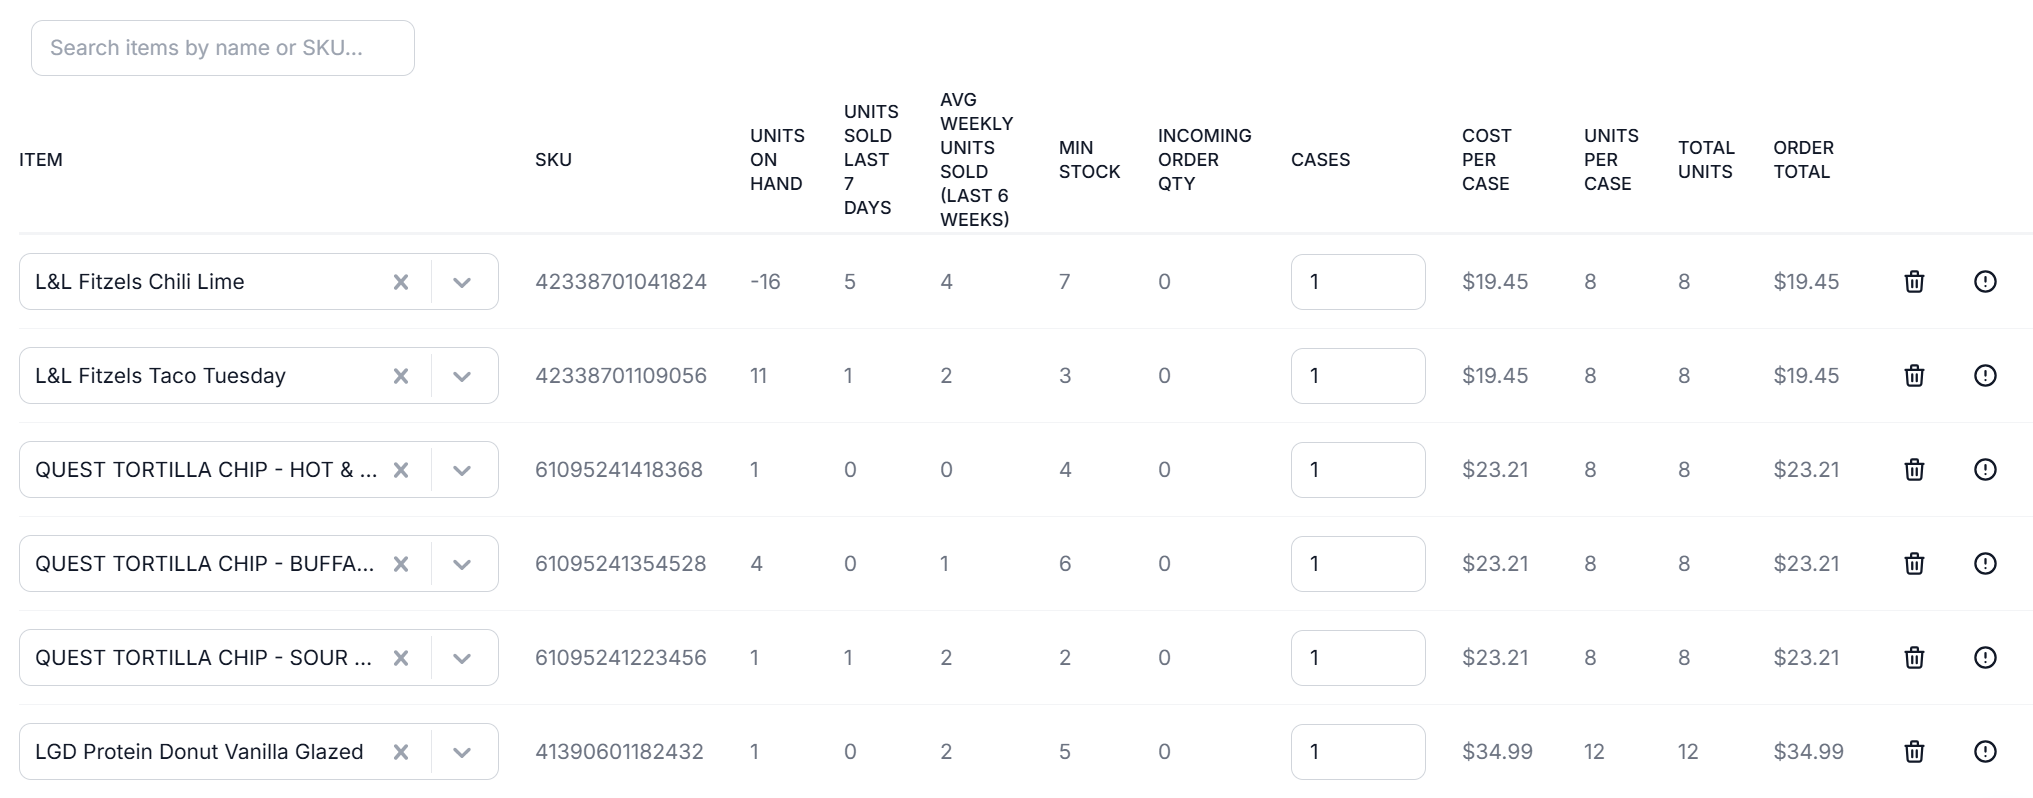
-
Once the items have been added, the following information about each item in the category will display
|
Column |
Meaning |
|---|---|
|
SKU |
SKU of the product |
|
Units on Hand |
Quantity of product in inventory |
|
Units Sold Last 7 Days |
Number of units sold in the last 7 days |
|
Avg Weekly Units Sold (Last 6 Weeks) |
Average number of units sold in a week, based off 6-weeks of sales data |
|
Min Stock |
Minimum quantity of product that should be in stock (set by Organization Admin) |
|
Incoming Order Qty |
Number of cases currently on order for the product |
|
Cases |
The number of cases that are to be purchased on the purchase order |
|
Cost per case |
The cost of the item to purchase for the organization |
|
Units per case |
The number of individual units that are received when a case is purchased |
|
Total Units |
The total amount of units that will be received. Calculated by multiplying Cases by Units Per Case |
|
Order Total |
The total cost for purchasing. Calculated by multiplying Cases by Cost Per Case |
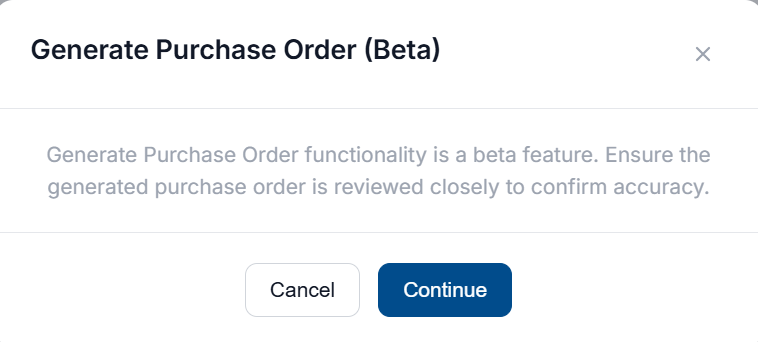
Generate Purchase Order (Beta)
Generate Purchase Order functionality is a beta feature. Ensure the generated purchase order is reviewed closely to confirm accuracy.
-
To auto-generate a purchase order based on current stock level and sales data, select Generate Purchase Order (Beta)

-
A model will appear with a notice that this is a beta feature. If you wish to use this feature, select Continue
-
A model will appear asking which category items you want the purchase order to be generated for. Select the Category dropdown and select the Category you want to add to the purchase order.
-
You can add multiple categories by re-selecting the Category dropdown and selecting another category.
-
You will see a brief loading screen while the purchase order is generated
-
Once the items have been added, the following information about each item in the category will display
|
Column |
Meaning |
|---|---|
|
SKU |
SKU of the product |
|
Units on Hand |
Quantity of product in inventory |
|
Units Sold Last 7 Days |
Number of units sold in the last 7 days |
|
Avg Weekly Units Sold (Last 6 Weeks) |
Average number of units sold in a week, based off 6-weeks of sales data |
|
Min Stock |
Minimum quantity of product that should be in stock (set by Organization Admin) |
|
Incoming Order Qty |
Number of cases currently on order for the product |
|
Cases |
The number of cases that are to be purchased on the purchase order |
|
Cost per case |
The cost of the item to purchase for the organization |
|
Units per case |
The number of individual units that are received when a case is purchased |
|
Total Units |
The total amount of units that will be received. Calculated by multiplying Cases by Units Per Case |
|
Order Total |
The total cost for purchasing. Calculated by multiplying Cases by Cost Per Case |
Common Errors Encountered during Purchase Order Creation
“Item is not found”
This error message means that the SKU for that item saved in Vego Inventory is not found in your supplier’s list of SKUs. Contact your administrator for further assistance with these items.
“Item out of stock”
This error message means that your supplier is currently out of stock of this item. You will need to wait until your supplier restocks that item before you can place a purchase order containing that item.

Sorting Items in Purchase Order
If you want to sort or order the items that have been added to the purchase order, you are able to select the headers of the purchase order to sort alphabetically/numerically.
When hovering over a column header, an up/down arrow will display depending on the current sort status.
Up Arrow - Not sorting by column or sorting descending
Down Arrow – Sorting by ascending
Removing Items
There are two methods to remove items from a purchase order;
-
Removing an individual item
-
Removing invalid items
Once a purchase order has been approved, items cannot be removed from the order in Vego Inventory. You will need to contact the vendor to cancel or adjust the order.
Remove Individual Items
If there is a need to remove an added item from the purchase order, this can be accomplished by selecting the trash can icon on the right side of the item you want to remove

Once the trash can icon is selected, the item will be automatically removed without warning
Remove Invalid Items
If there are any items coming up with errors, such as “Item is not Found”, the Remove Invalid Items button on the top right of the page can be used to remove all error-causing items.
Any item that is displaying an error message will be removed from the purchase order.
Viewing Item Sales History
Each item in Vego Inventory has a sales history tied to it from daily sales imports. To view the past month’s sales history for an item that has been added to the purchase order, select the info icon to the right of the trash can icon
Once selected, the four-week sales report will display
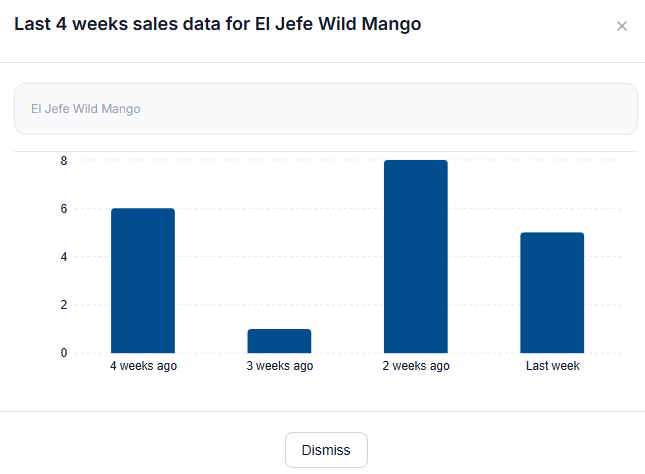
This report will show you a breakdown of how much of the selected item has been sold by week for the last month. This is a useful report to make informed decisions on how many cases should be purchased.
Each reported sale is by unit, not by case.
To exit the sales report and return to the purchase order being created, select the X in the top right corner of the report, or Dismiss at the bottom of the report.
Running an AI Review
Users can utilize an AI review to help determine the recommended order quantity for items listed on the purchase order. The AI Review will take higher risk items or items that have varied history of sales and review the locations data to help determine the quantity of stock that should be ordered. To run an AI review;
-
Access the Purchase Orders menu tab.
-
Select the Purchase Order you want to run an AI review on
An AI review can only be run on Draft, or Requested purchase orders.
-
Select Run AI Review from the top-left of the purchase order

-
A notification will display when the review is completed, and the Cases field will be updated for any items that have been changed

Purchase Order Actions
To finish working on a purchase order, there are three action types that can be taken
-
Save Draft – Will save this purchase order as in-progress, allowing further modifications to be made when necessary
-
Submit For Review – Will submit the purchase order to the purchase order manager
-
Cancel – Will cancel the drafted purchase order. This action is not reversible.
Purchase orders can be edited after they have been submitted for review, however, you must re-select Submit for Review in order for the changes to save.
Once an order has been Ordered, or Rejected they cannot be edited.
Duplicating an Order
Vego Inventory allows the user to duplicate previous purchase orders. To duplicate a previous purchase order;
-
Access the Purchase Orders menu tab.
Only items with a status of Requested, Received, Partially Received, Ordered, or Rejected are available for duplication. Draft orders cannot be duplicated.
-
Navigate to the purchase order you want to duplicate and select the clipboard icon on the right side of the purchase order.

-
Users can also duplicate a purchase order by opening a previous purchase order and selecting the Duplicate option located underneath the order number.

-
This will open a new purchase order with the same items and quantities from the previous purchase order. Users can then make necessary changes to the order.
-
To finish working on a duplicate purchase order, there are three action types that can be taken
-
Save Draft – Will save this purchase order as in-progress, allowing further modifications to be made when necessary
-
Submit For Review – Will submit the purchase order to the purchase order manager
-
Cancel – Will cancel the drafted purchase order. This action is not reversible.
-
Deleting a Draft Purchase Order
Users are able to delete draft purchase orders for their location. To delete a Draft purchase order;
-
a
-
Select the trash-bin icon on the right side of the Draft Purchase Order

Requested, Rejected, Ordered, Partially Received and Received purchase orders cannot be deleted.
-
A prompt will appear, confirming that you want to delete the draft purchase order. Select Yes, Delete it to continue
-
The Draft Purchase Order will be deleted.
Deleting a drafted purchase order may not be recoverable, so please ensure you don’t need the purchase order anymore before deleting it.
Reviewing Requested Purchase Orders
Once a purchase order has been created and submitted for review, before it is sent to the suppliers, the purchase order needs to be reviewed by a purchase order manager (District / Regional Operations Manager).
Review further information on reviewing request purchase orders here.
Receiving Order
Once the goods requested in the purchase order arrive at your location, import that shipment into Vego Inventory by following the directions here
Partially Received Orders
A partially received order is exactly what it sounds like. If your club orders 5 items from your supplier, but only receives 4, the order will be marked as “Partially received” in Vego Inventory.
Another way to think about this concept is that a single order is sent in multiple shipments by your supplier. Vego Inventory will automatically determine for you if an order has been fully received or partially received, so all you have to do is select the correct purchase order and scan in the inventory that has been received. The process of receiving an order and partially receiving an order is exactly the same. Follow these instructions to receive an order.
Notifying Vendor of Missing Stock
For partially received orders, users can notify the vendor and request a status update on the remaining items for the purchase order directly through Vego Inventory. To notify the vendor of missing stock, follow these steps;
-
Access the Purchase Orders menu tab.
-
Select the Partially Received Purchase Order from the locations records
-
Select Notify Vendor of Missing Stock on the top right of the Purchase Order
-
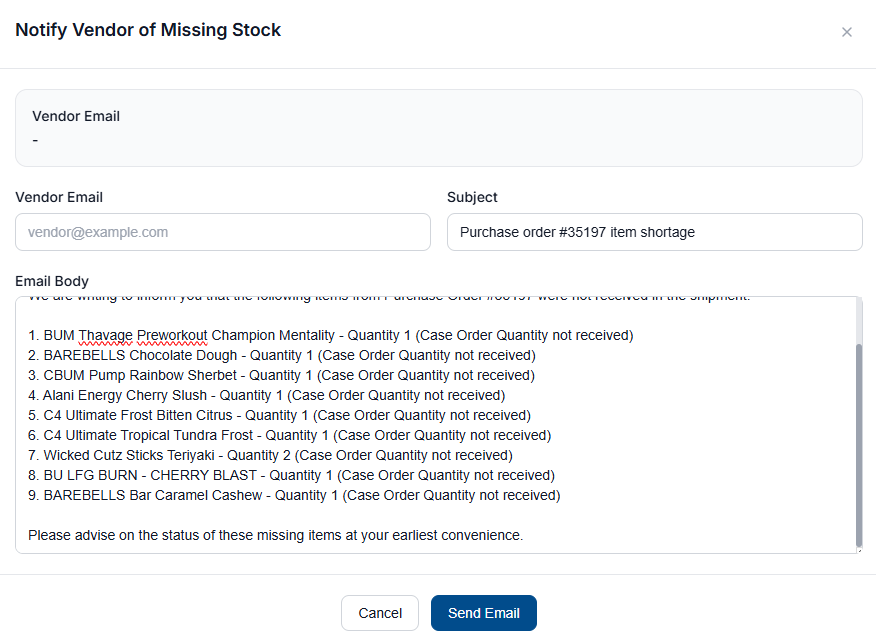
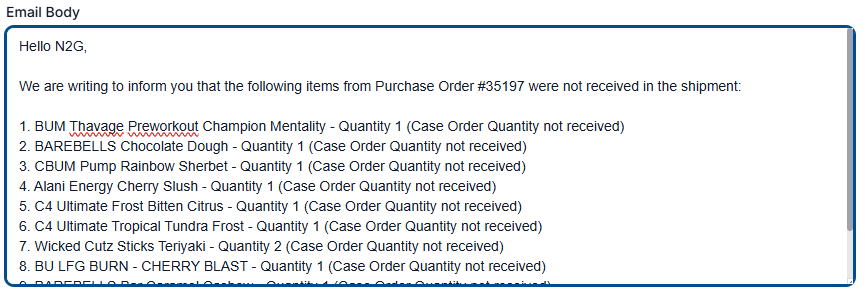
A new window will open with a pre-formatted email to the vendor
-
Verify or enter a vendor email address in the Vendor Email field
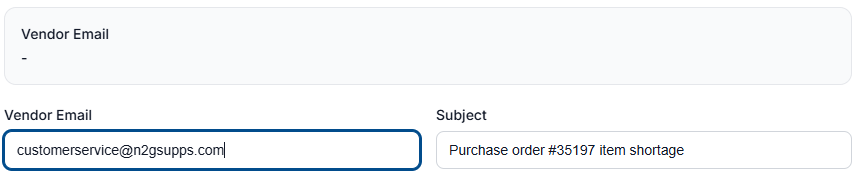
Vendor email may not be pre-filled if it has not been entered into the vendor settings by your organization admin.
-
Verify the purchase order number in the Subject field is correct

-
Verify that the purchase order number, and missing items are correct in the Email Body, and make any necessary adjustments to the message
-
Review email for accuracy, then select Send Email
-
The email will be sent to the email address entered in the Vendor Email field

-
Responses from the vendor will be sent to the email address associated with the purchase order